There’s nothing like getting into the great outdoors to refresh your spirit.
But not all doses of nature are created equal.
According to the sage 20-5-3 Rule, you should ideally aim to spend at least 20 minutes in green space three times a week, 5 hours in a semi-wild environment once a month, and 3 days completely off-grid each year.
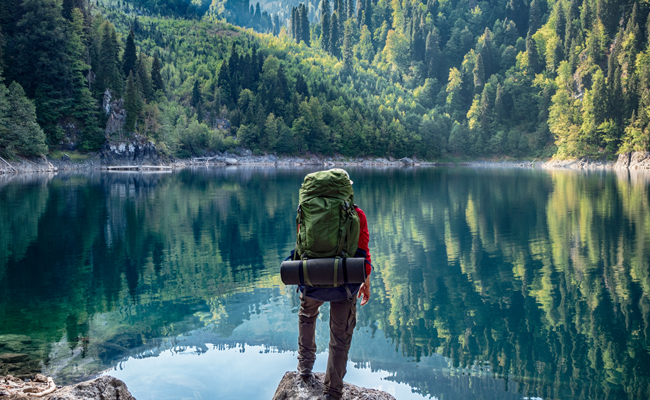
The best way to fulfill that last requirement is to go backpacking.
What’s great about backpacking is that when you pull into a state or national park, you’ll see tons of people fishing, picnicking, RV-ing, picture taking, and day hiking at accessible points close to the parking lots. But once you get deeper into the park, the crowds fall away, and you’ll often only see a few other people. It can feel like you’ve got thousands of acres of wilderness all to yourself. Just beyond the slipstream of comfort, you find an experience that’s wilder and more satisfying than car camping and really does body, mind, and soul a great deal of good.
Of course, the same reason backpacking is a less popular and more solitary experience — the fact that it’s harder to plan and carry out than other outdoor activities — also makes it more difficult to get going with.
If you weren’t a Boy Scout as a kid and didn’t backpack with your family growing up, the idea of taking a trip into the woods, carrying everything you need on your back, can feel a little intimidating and overwhelming.
That’s where this guide comes in.
If you’ve always wanted to get into backpacking, but haven’t known how to start, below we’ll outline exactly how to take your very first trip — and make it a big success.
Plan Your Itinerary
The overarching principle behind this first-time backpacking trip is that you want to make it as enjoyable and successful as possible, giving yourself the best shot at getting hooked on this activity.
To that end, you’re going to plan an initial trip that has a bit of challenge, for interest, but is largely accessible and low-key. You can achieve this, by following these steps:
Make it an overnight outing.
For your first trip, you’re only going to be camping out one night. You might have an idea in your head that only multi-day backpacking trips count as “real” backpacking trips. But 1) This isn’t the case; even though we’ve been on several multi-day trips, we still enjoy popping off for a quick overnighter. There’s no right or wrong way to backpack. 2) Adding days adds complexity, and for your first trip, you’re going to keep things as simple and low-stakes as possible.
The purpose of this first trip is just to acquaint yourself with the general dynamics of backpacking and the use of your gear. It’s simply to get your feet wet and build a little comfort and confidence with the endeavor. (This is doubly true is backpacking with kids!)
Download the AllTrails app.
We’re not affiliated with this app, but are fans of it, and it will make planning your trip a whole lot easier. Amongst other handy features, you can filter your searches for trails by which ones are good for backpacking.
Pick your route/trail.
As you pick what trail you’re going to backpack, take into consideration these factors:
Choose a loop if possible. It will make your hike more interesting than an out-and-back route.
Choose a trail with a “payoff” — a waterfall, lake, scenic view, etc. — if possible. This will also add interest to your hike.
Choose a moderate/hard trail. The trails that are rated “Easy” on AllTrails are typically short, flat, and/or even paved. You’ll want a bit more challenge. Even some trails rated “Hard” can be doable for your first time out. There isn’t a strict criteria for what makes a Hard trail Hard, and some Hard trails are harder than others. Elements that make a trail easier/harder include its rockiness/smoothness, the steepness of its slopes, the altitude, the total elevation gain, and the elevation gained per mile. And the difficulty will also depend on your personal fitness level. But don’t get lost in the technical weeds in figuring out how hard a trail is; looking at the AllTrails reviews will generally give you a good idea of a trail’s difficulty. Also see if the reviews mention first-time-out buzzkills like the fact that the trail is overgrown, hard to follow, offers minimal sun cover, or includes lots of downed trees. Overall, opt for a trail that’s easier rather than harder and looks like a good time.
Choose a trail/route that’s about 10-15 miles long. That distance might not seem like a lot if you’re thinking of regular walks around your neighborhood, where you might be able to go a mile in 17 minutes. But when you’re wearing a pack and particularly when you’re hiking uphill, you’re going to be moving a lot more slowly; plan on averaging about two miles per hour + time for breaks.
You can break up the mileage according to preference and where campsites are located along the trail (AllTrails will sometimes indicate this on the map). For example, if you’re taking a 12-mile trail, you can get to the trailhead at noon, hike 8 miles in four or five hours, make camp and relax for the night, and then hike 4 miles out in the morning.
Be sure there are adequate water sources along the trail to refill your water bladder as you hike. You will need around 1 liter of water for every 4-5 miles you hike.
Go for a longer trail if you’re physically fit and/or the terrain/trail is easier; choose a shorter one if you’re less physically confident and/or the trail/terrain is harder. Note that whatever trail you choose, you’ll need to be in reasonably good shape to enjoy backpacking; if you’re not fit, you’ll struggle, and even when you are, rucking with a heavy pack can be strenuous (especially if you’re hiking at higher elevations). Be working out regularly and taking lots of walks in the months before you go.
As you select a trail using the above considerations, don’t get too hung up on finding a “sexy” trail. Something local that’s flat and more pedestrian is more appropriate for a first-time trip than heading into the alpine environs where the weather and wildlife are more unpredictable and you’re not acclimated to the elevation.
Get a permit/reservation.
Some parks (particularly of the national variety) require getting a permit ahead of time. They typically also reserve some slots for walk-up campers, but know the regulations, and get an advanced reservation if you can.
Go on a weekday.
With backpacking, you can hypothetically camp anywhere in a park (unless the park has particular restrictions). But practically, there aren’t often a lot of good spots (i.e., flat, open areas where you can pitch a tent and make a fire) along the trail, and you’ll want to make camp at the rustic-but-established campsites you’ll only find in certain areas along the way. Unless there’s a reservation system in place, these spots are taken by backpackers on a first-come-first-served basis, and you don’t want to hike 10 miles into the mountains, get to your planned-on camping area, and find that all the good spots are occupied. So rather than taking your first backpacking trip on the weekend (especially a holiday weekend), go on a random weekday when it’ll be much less crowded — like a Monday or a Tuesday.
Check the weather.
Remember, the names of the game for this initial outing are enjoyment, simplicity, and low stakes. Inclement weather and very hot/cold temps make things significantly less fun — and potentially dangerous.
Ideal backpacking weather resides between the low 80s for the high and above freezing for the low. The 80s may not seem too hot when you’re lounging in the backyard, but when you’re schlepping a heavy pack uphill with the bright alpine sun beating on you, it feels very hot indeed. 50s, in regular life, seem chilly, but again, when you’re moving under weight, that actually feels perfect. When the temps dip below freezing at night, it can get pretty uncomfortable and make it hard to stay warm when you sleep, necessitating a better sleeping bag.
In many areas of the country, the best time to take a backpacking trip is in the shoulder seasons (spring/fall), as the temps will be ideal, and it’ll be less buggy. But there are places in the mountains where you have to wait for summer for the snow to melt and the ideal temperature range to arrive.
Shortly before you go on your trip, check the forecast for rain. While you can look up national parks on weather apps, with state parks, you have to make do with checking the town closest to the park; either way, remember that storms in the mountains can be unpredictable, and it will get significantly colder as you go up in elevation (dropping ~3.5 degrees F for every 1,000-foot increase). So the forecast isn’t foolproof, but you can pick a day to go that looks to be almost assuredly balmy and clear. If bad weather crops up in the forecast for the day you were planning to go, reschedule for another time.
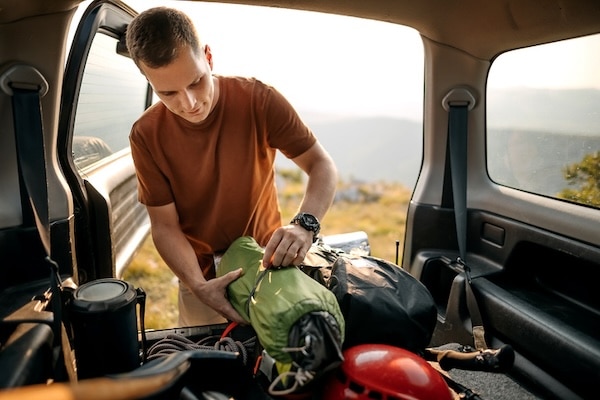
Gather Your Gear
You do need a lot of special gear for backpacking, and backpacking gear is expensive. So for this first trip, borrow as much of it from friends and family as possible; once you’ve established that this is a hobby you’d like to stick with, then you can purchase your own.
Here are the essentials you’ll need to pack:
- Tent
- Sleeping pad
- Sleeping bag
- Backpacking stove (see note on food)
- Spoon (see note on food)
- Food*
- Sunscreen
- Paper map and compass (as backup navigation; learn how to use them)
- Bug spray
- First aid kit (knowing how a tape an ankle is especially useful)
- Firestarters
- Matches
- Backpack rain cover
- Water filter (learn about the different kinds of filters and how to use them)
- Knife/multitool
- Plastic/ziplock bag for trash (be prepared to pack out what you pack in and be sure to Leave No Trace!)
- Jacket/hoodie (depending on weather/environment)
- Rain jacket (ditto)
- Water bladder or Nalgene bottles (here are the pros and cons of each option)
- Headlamp
- Bear bag/canister (if you’re hiking somewhere with bears; learn how to hang a bear bag)
- Bear spray (ditto; learn how to use it)
- Trowel + toilet paper (it may be possible to dig a proper cathole with a rock or stick, but a trowel will make it much easier)
- Hat
- Sunglasses (can be essential or nonessential depending on how wide the brim of your hat is)
- Power bank for phone (if you’re going to be using your phone for navigation/reading, its charge won’t last the trip)
Here are some things that are nice to have, but aren’t essential:
- Backpacking pillow (if you don’t have one, you can just use a rolled-up sweatshirt or go without)
- Extra socks. If you’re going to be in a warmer environment, where your feet will get sweaty, and you’re worried about blisters/hot spots, change your socks every few hours, taking the sweaty ones off your feet and clipping them to your backpack to dry as you hike, and putting on the dry pair. This can really help. (Here are some other tips on taking care of your feet while hiking.)
- Advil PM. It can be hard to sleep while camping, especially at high elevations, and this can help with that, as well as with the soreness you may develop from your hike.
- Camp shoes. It feels really good to be able to take off your hiking boots and put on some comfy slip-ons or sandals when you make camp for the evening. Plus, Tevas are handy to have if you need to cross streams during your hike.
- Wet wipes. For cleaning hands/freshening up.
No need to bring a toothbrush; you can skip that habit for a day (we won’t tell your dentist). No need to bring contact solution either; you can sleep in your contacts for a night (we won’t tell your optometrist). But if you wear contacts, do bring an extra pair, in case one pops out.
You also don’t need to bring a change of clothes. And the clothes you wear don’t have to be special, either. There’s lots of slick outdoor clothing out there, and we have a good write-up on how to properly dress for a hike here. But you really don’t need anything high-tech for this first-time trip. As long as you’ve got a rain jacket/poncho to stay dry, and a tent/sleeping bag to warm up in, and you’re hiking in a non-extreme environment with temperate temperatures, if you fail to wear just the right clothes or layer optimally, you may get uncomfortable, but you won’t die. Your dad probably backpacked in cut-off denim shorts and a tank top. Don’t overthink what to wear. You can invest in more technical clothing later.
You’ll need hiking boots, of course. Some prefer trail running sneakers, even for longer hikes. Either way, your shoes should already be broken in; do walks in them around the neighborhood before your trip.
*A Note on Food: This easiest menu for a first-time overnight trip is to bring snacky stuff (dried fruit, trail mix, energy bars, beef jerky, etc.) for actual snacks and for lunch on Day 1 and breakfast on Day 2, and a dehydrated meal for dinner on Day 1. Having at least one warm meal during your trip is a morale booster, but if you don’t have a backpacking stove, then you can subsist entirely on heartier snacky stuff; in addition to the already mentioned, try crackers + cheese + summer sausage or packets of tuna fish.
Bring a lot more food than you think you’ll need; backpacking will make you hungrier than you imagine. Pack about double the amount of calories you typically eat in a day, erring on the side of bringing too much over too little.
Finally, once you’ve got all your gear gathered, learn how to pack it for optimal carrying comfort.
Hit the Trail!
Before you leave for your trip, download an offline map of the trail from AllTrails. You may not have reception during your hike.
Also let a friend or family member know where you’re going and your itinerary.
Enjoy yourself on the hike! You don’t need to prove anything or push yourself hard. Allot plenty of time to get to your targeted campsite while there’s still daylight and move at your own pace.
Above all, don’t worry: you may forget something or something may go wrong, but you can tough out anything for 24 hours. You’ll survive, and you’ll have learned something that will improve your next experience.
Speaking of which, you may want to do another overnight trip for your next go-around to further get your backpacking feet under you. Or you might want to add a day, which really just involves a little more planning of your route and doubling your food.
Backpacking just might become a lifelong love of yours, so get out there and try it! Happy trails!