As we’ve established over the years, there are a number of relatively easy automotive maintenance tasks that you can save money on by doing yourself. Not only that, there’s an intrinsic satisfaction that comes with fixing something with your own two hands, even if it’s a simple task.
Let’s add to that list by showing you how to replace your windshield wipers. You’ll save probably $10-$15 per wiper blade over having it done at a shop, and it will only take you about 15 minutes (less after you’ve done it a few times). That’s admittedly not a ton of money, but every little bit helps in the war on debt, and again, you’re gaining a tiny bit of self-reliance to boot.
Let’s get right to it.
When Should You Replace Your Wiper Blades?
The easiest way to tell if you need new wiper blades is to simply gauge their effectiveness when being used on the road. Are the wipers leaving the windshield (or at least the areas covered by the blades) just as wet and/or dirty as it started? Is there some film/grime left over after each pass of the blades? When it’s raining or snowing and your wipers are in use, do you find yourself needing to watch the road through one tiny spot of windshield that’s been successfully cleared? If you answer yes to any or all of these questions, it’s time for new blades.
You’ll also know if your wipers need replacing if they make a chattering noise and don’t smoothly glide across the glass. And finally, you can do a visual inspection. If the rubber looks worn or cracked, it’s time for a change. This usually happens annually, though it can more or less depending on how often you use them and the environment you’re in.
Ultimately, if your wipers aren’t doing their job anymore and you’re having a hard time seeing the road in the midst of rain and snow showers, change ’em out.
How to Buy Wiper Blades
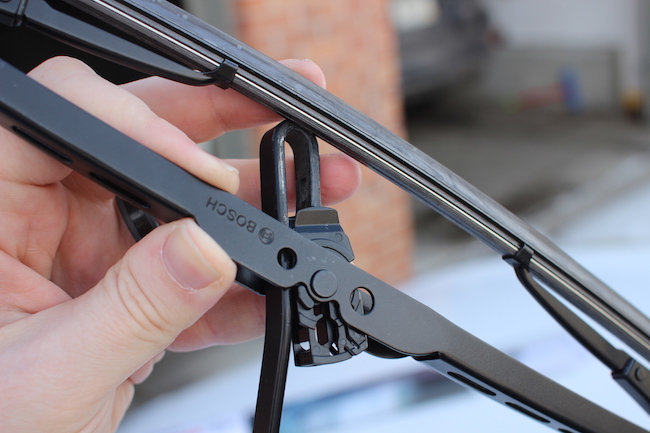
You can see the hook-type connecting mechanism here.
The large majority of cars on the road use what’s called a hook-type wiper blade. This is a reference to how the blade attaches to the wiper arm. There are various styles of blades themselves, but as long as the connection is a hook-type, you’re in for an incredibly easy task. This is mostly what you’ll see at auto stores and online (you can buy wipers on Amazon), and many will now even adapt to whatever type of connection you have, be it a hook-type, pin-type, or other style. For instance, this Rain-X blade has an adaptor that claims to be compatible with over 95% of vehicles on the road. You can visit any auto parts shop (AutoZone, O’Reilly’s, etc.) and ask them to look up what will work for your vehicle — they’ll all have that information handy if you’d rather not guess at it.
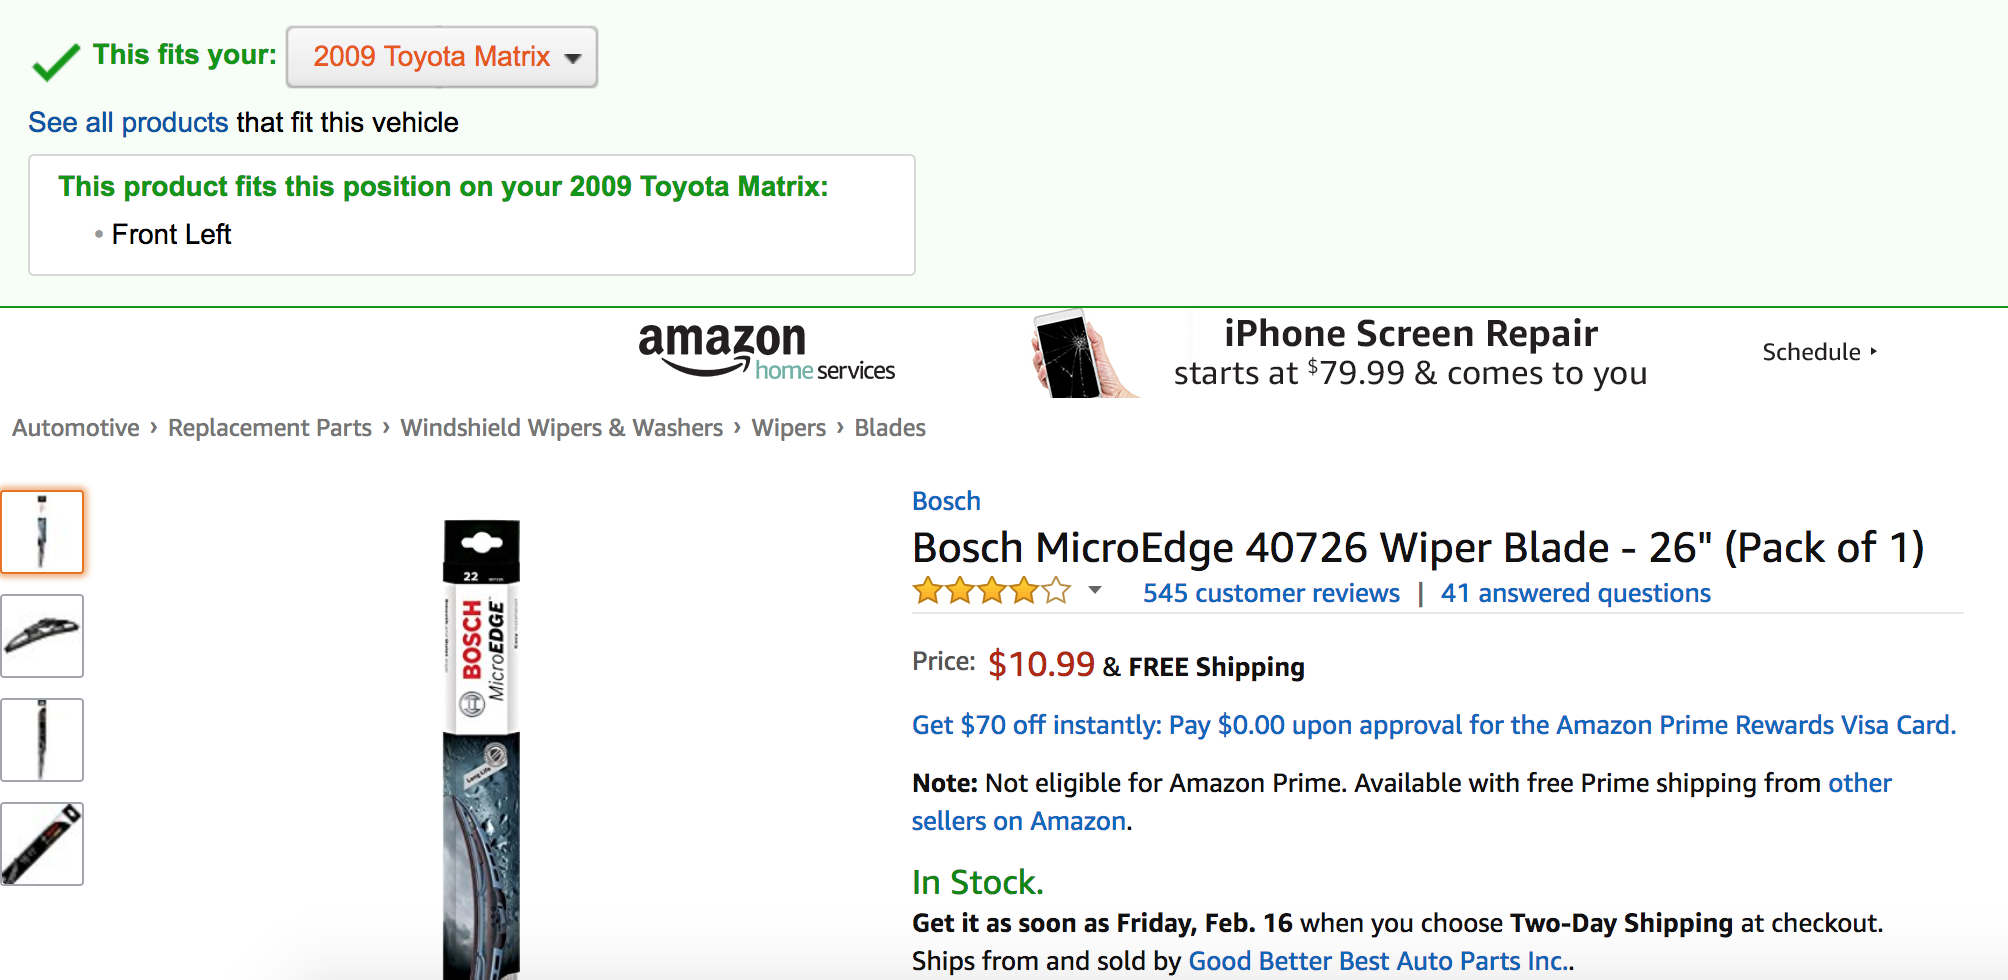
Handily, Amazon also lets you enter in your vehicle info and will show what blades are compatible with it.
If you’d like to do that legwork yourself (it doesn’t hurt to know firsthand), measure what’s already on your car. You’ll find blades anywhere from 12-28”, and it’s probable that your two blades are actually different sizes (with the driver’s side blade being longer). On our car, for the sake of example, the driver’s side blade is 26” and the passenger’s side is 17”. Be to sure to flatten the blade when measuring versus trying to measure it while curved.
When you first go into a store to buy wiper blades, you’ll likely be a little overwhelmed by all the choices. You’ll find blades ranging from $20+ each to under $10. How do you know what to go with? All the advice out there basically says to find something in the happy middle. You don’t need the most expensive, but you shouldn’t buy the cheapest either. I bought blades that were each around $13 (they were slightly different prices since they were different lengths). Even if only one blade is worn, you should always replace both blades at the same time since the other likely isn’t far off.
If you’d like, you can experiment and test out different price ranges every time you switch out your blades, just be sure to not mix-and-match brands and price points on your windshield at any given time.
How to Change Your Wiper Blades
1. Remove new blades from packaging and have them at the ready. The wiper arm is metal, and when you remove the old blade, it’s best to have the new one ready right away so you can immediately replace it. You don’t have want to have to fiddle with packaging and have your wiper arm fall or be knocked onto your windshield, possibly scratching or cracking it. That’s not terribly likely, but it is possible.
2. Lift the wiper, turn the blade perpendicular to the arm, and locate the release tab.
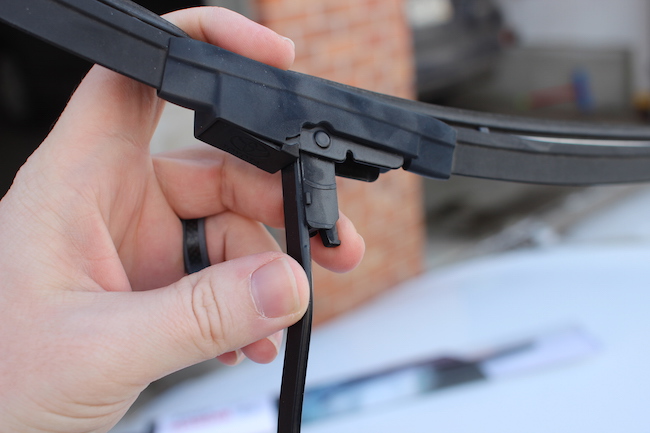
Not all wipers will have this release tab. On some, you’ll simply turn the blade perpendicular, and pull down.
3. Press the tab and pull the blade down. Your instinct might be to yank up; don’t do that. You won’t damage anything, it’s just not going to get your blade off.
4. Next, turn the blade parallel to the arm, and pull it off. It’s that easy! Seriously.
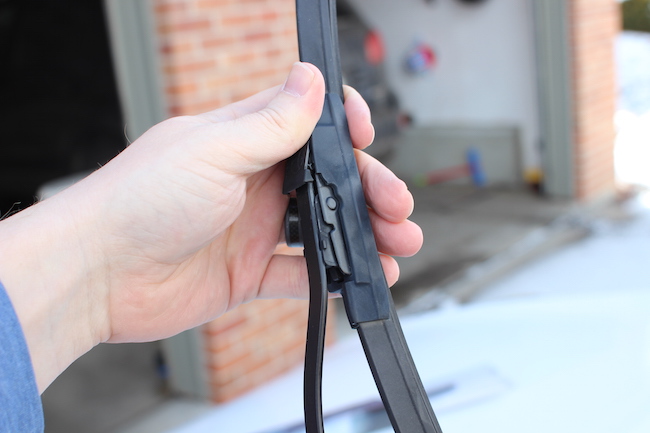
From here, it easily slides off (to the right).
5. Repeat this process, in reverse, to install the new blade. Start parallel to the arm, thread it into the slot, then turn it perpendicular, and finally pull it slightly up to lock it in place. You should hear some sort of audible click, or at least feel that it’s snapped in, to confirm that the blade is now properly installed.

The new blade. This one has a swiveling part that the hook latches into. How the blade actually snaps into place might be different from your old one; don’t worry, I’d never done it before and figured it out just fine.
6. Test out with windshield wiper fluid. Give your windshield a squirt and test out the new blades. Then, be impressed with yourself, and slightly embarrassed that you’ve never done this incredibly simple DIY car maintenance task before. (Yes, I’m talking to myself here.)
Tags: Cars

