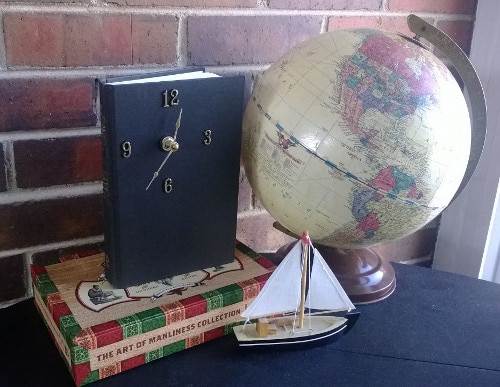
I love anything with secret compartments. From the big (secret passageways) to the small (a secret pocket in a jacket), there’s just something delightful about things that are hidden away.
Which is why I’ve always been drawn to book safes. They combine my love for secret compartments with my love for books. And they’re just a lot of fun.
Book safes are an age old way to stash one’s treasures–the key to a safe, a private document, a flask, a gun. And you can use them while traveling to hide your ipod, back up cash, or other valuables from would-be thieves. And of course if you end up wrongfully imprisoned, they work as an excellent place to stash a rock hammer for tunneling to freedom (salvation lies within!).
Not only are book safes fun to possess, they also make a cool, unique gift. If money is tight this year, consider making a few book safes for your friends or family. The supplies you need only cost a few bucks, and each will take you about 2.5 hours or so to create. Here’s a step by step rundown of how it’s done.
A side note: I know there will be people who cry foul at this project-arguing that cutting up a book like this is sacrilege. I personally don’t understand that kind of fetishization of books. Books are not intrinsically sacred. These are generally books that no one wants and will otherwise go to waste. You’re not destroying the book, you’re turning it into something else. There’s value either way.
1. Buy a Book. Head to your local used bookstore and pick one up. It doesn’t have to be fancy; they always have bargain books that you can snag for just a dollar or two. Personally, I love the look of vintage books, especially for a project like this. Of course if there’s a book on your shelf that you’re not fond of and wouldn’t mind hacking up, all the better.
There are a few things to keep in mind when selecting a book. First, consider what you’ll want to hide in it and how much time you’re willing to put into making it. Thick books will allow you to make a deeper cavity, but carving out that cavity will require more time. A thin book will hold less treasure, but necessitate less cutting time.
Second, choose a book that will fit in on your shelf. If you’ve got a shelf full of new mystery paperbacks, a large vintage medical textbook will look suspicious and out of place.
Finally, consider picking a book that people aren’t likely to pull off your shelf out of curiosity. Think The Economic History of Kazakhstan instead of The Secrets of Better Sex.
But if you’re giving the book safe as a gift, choose a volume that suits the personality and interests of the intended recipient. For Whom the Bell Tolls for Dad; Nancy Drew for little sis.
2. Gather Your Supplies. You’ll need:
- a book
- a box cutter
- a brush
- puzzle glue
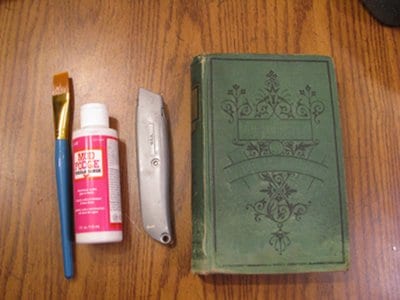
You can also use regular glue mixed with water. I’ve seen the recommended glue/water ratio as 80/20 or 70/30. I’ve haven’t tried it myself, so you may want to experiment to get the ideal consistency. Too much water and you’ll warp the pages and book.
I also recommend grabbing a ruler to mark the outline of your secret compartment and a few extra blades for your box cutter. The blades get dull quickly and rotating and replacing them helps the cutting step go much quicker.
3. Mark off a few pages in the front. You don’t want to start carving out the secret compartment on the very first page. Leave a few pages in the front untouched, so the compartment is covered and the book looks normal when initially opened.
4. Wrap the cover with plastic bags. To keep glue off of the cover, wrap it with plastic bags. Stick one in-between the pages you marked off in the front and wrap it around the front cover. Then wrap another bag around the back cover.
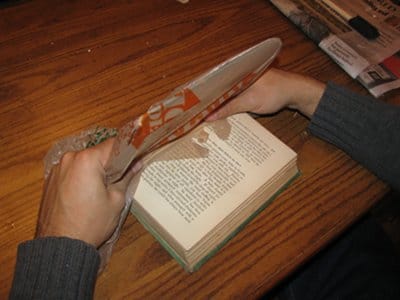
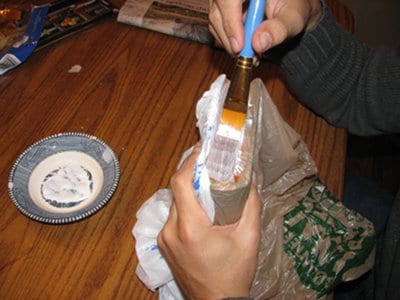
5. Brush glue on the outside of the pages. Brush the glue on the outside of the pages all around the book. Put on a few layers, but make sure to smooth out any globs as they will dry white. Press the book firmly in your hand to keep the pages together as you glue them.
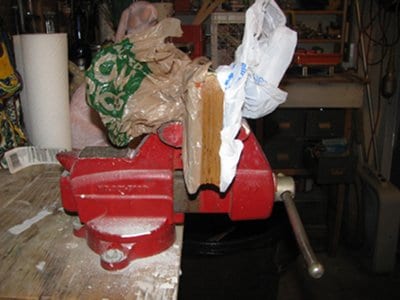
6. Place the book in a vice or under a weight. To cut down on warping, place the book in a vice or under a heavy weight such as several large books. The pressure will hold the pages together as the glue dries. Let the book dry for about an hour.
7. Draw the outline of your secret compartment. Using a ruler, trace an outline of the secret compartment on the first page of the glued together section of your book. It can be any size or shape you want, but leave at least a half an inch border all around it.

8. Cut out the secret compartment. Using your box cutter, cut along the outline of your secret compartment. Take it slow-don’t try to do too much at one time or you’ll end up with ragged edges. The hardest part is the corners; every now and then go back and clean them up.
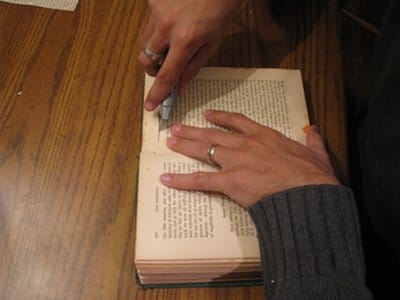

This is the part of the project that takes the most time-so just put on some tunes and get in the zone. Rotate and replace the blade of the box cutter a few times in order to keep it sharp and efficient.
If you have one, you can also use a scroll saw to cut out the compartment, which obviously saves a ton of time and also allows you to make the compartment into more creative shapes.
9. Brush glue on the inside of the cut pages. You can also add another layer of glue to the outside of the cut pages if they look like they need it. Using puzzle glue, I didn’t need to.
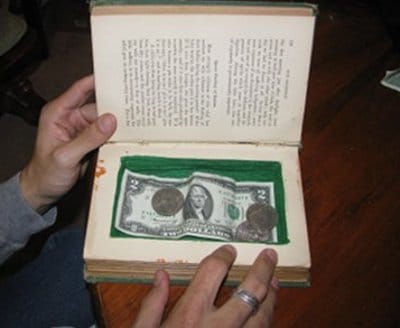
10. Glue felt inside the secret compartment. This isn’t necessary but it’s a nice touch, especially if you’re giving the book as a gift. The felt covers up the ragged edges and gives it a finished look.
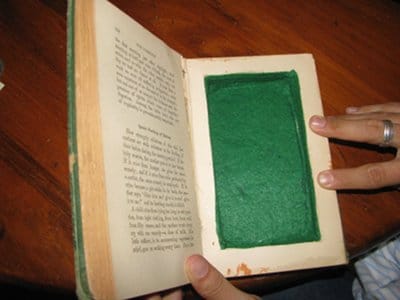

Now no one will steal my precious $2 bill and half dollar coins!
Have you ever made a book safe? Do you have any tips for variations and improvements? Share your comments with us!


