Editor’s Note: This is a guest post from Ethan Hagan at One Project Closer.
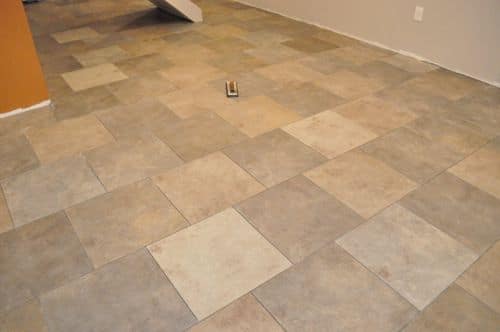
Grouting tile joints is one of the last steps for installing a tile floor, and if done properly, grout gives the floor a cohesive, finished look. To demonstrate the proper way to apply grout, I’ve partnered with Jim and Rich from Diamond Tile located in Baltimore, Maryland. Both of these guys have almost three decades of experience, and today they’re grouting a newly installed, basement floor.
If you’re considering installing tile, check out the One Project Closer project guide for How to Install a Tile Floor. It covers everything from preparing the subfloor, to marking guidelines, to laying and finishing tile.
Tools & Materials
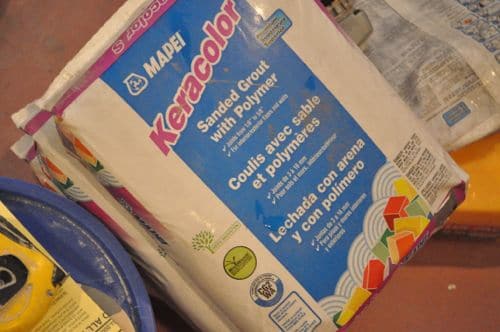
Rich and Jim recommend Mapei brand products, and for this project they’re using Keracolor S, which is a cementitious grout with a polymer additive. The additive helps the grout dry harder and resist stains. Grout is available in sanded and un-sanded varieties. Sanded grout is appropriate for tile joints 1/8″ to 1/2″ wide. Smaller joints should be grouted with un-sanded grout. You may not find Mapei at your local DIY center. Instead, check with local tile suppliers.
The other tools and materials the guys are using include:
- Small trowel
- Grout float
- Sponge
- Two 5-gallon buckets of rinse water
- Corded drill with mixing paddle
- Gloves
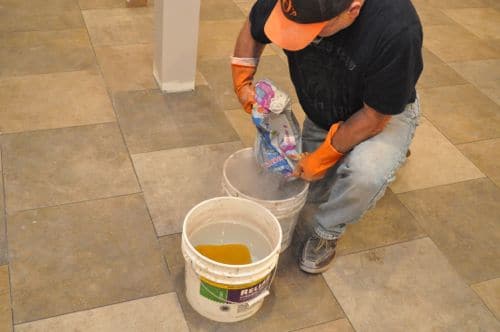
Step 1: Mix the Grout
Mix up a large bucket of grout, and target a creamy consistency and uniform color. Rich advised that if the grout is too thick, it will be very difficult to spread. If the grout is too thin, it won’t properly adhere to the joint. Rich also recommended avoiding well water because it can cause the grout to effloresce, leaving a white haze after it cures.
Slaking is the process of leaving the grout undisturbed to allow the water to completely penetrate the dry ingredients. After the initial mix, let the grout slake for about five minutes before re-mixing everything.
Step 2: Spread the Grout
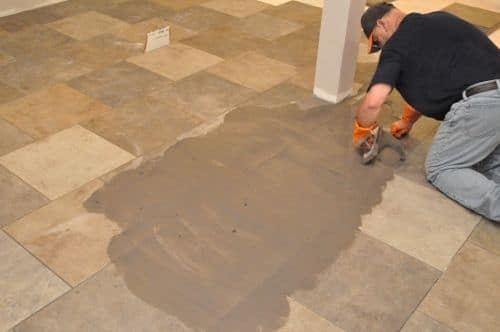
Start on one side, working across the floor in narrow rows to keep everything in reach.
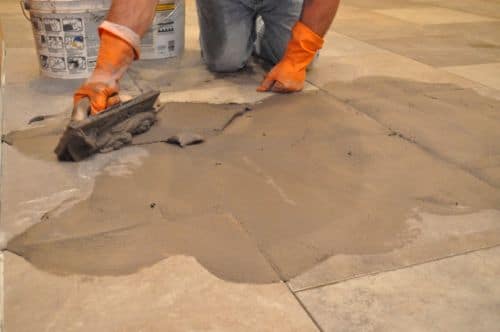
Use the grout float to force the grout into the joints, packing them tight to eliminate any voids.
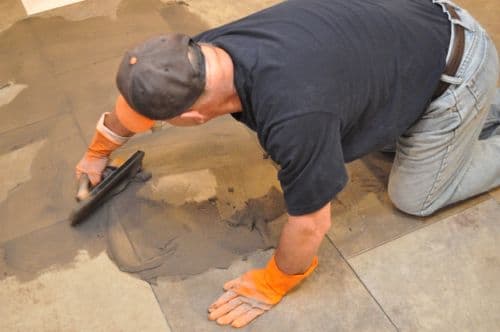
Hold the float at about a 45° angle as you go across the joints and scrape away excess grout.
Step 3: Sponge the Joints Clean

Sponging the grout too soon will pull it out of the joints, so let it set for about 15 minutes. After that, use a damp sponge to clean the face of the tiles in a light, circular motion.
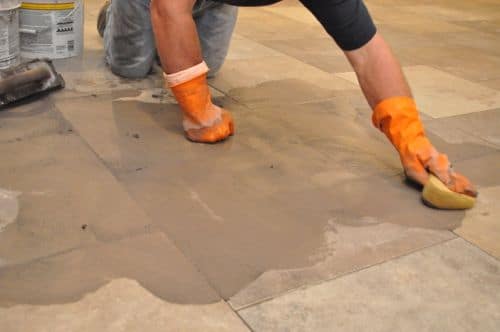
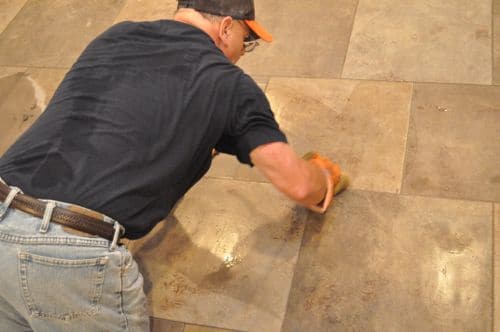
Next, clean the sponge and go over the tile again, wiping at a slight diagonal to the joint. Use a different side of the sponge for each pass. If after a few hours a slight haze appears on the face of the tiles, it can be buffed off with a dry towel or cheesecloth.
Step 4: Continue Spreading and Sponging
Working in these small sections, you’ll complete the entire floor.

Step 5: Let It Cure
The grout needs about 24 hours before the floor is ready for foot traffic. Jim and Rich usually don’t recommend sealing the grout because modern products often include stain resistance. Plus, any benefit is short-lived. The only exception is high-traffic areas that will be prone to stains (like the kitchen).
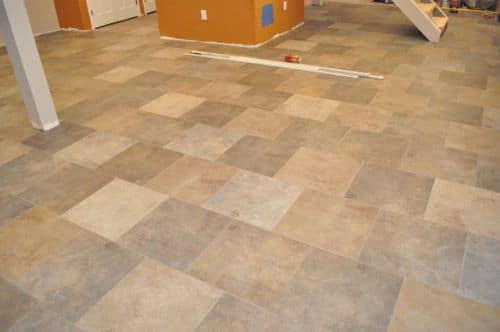
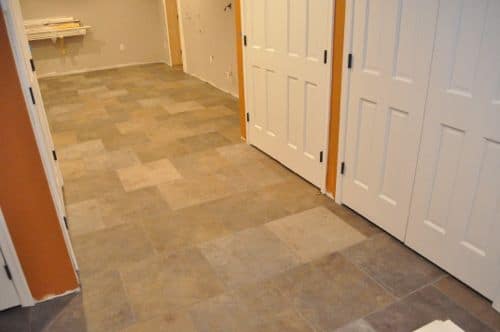
Finished

Ethan Hagan owns and operates a home improvement website called One Project Closer. On One Project Closer you’ll learn how to tackle projects with expert knowledge from professional contractors. OPC also provides coupons to home improvement centers, like this Home Depot Coupon page. Check out OPC for full details, and follow them on Facebook.