My bread-baking hobby all started with a Netflix documentary. Cooked, based on Michael Pollan’s book of the same name, explores the origins of food in our world and communities. One of the episodes — “Air” — focused on bread. Pollan, who also narrates the series, takes us on a world tour of the history and science of bread-making. With just 4 simple ingredients, he explains, a world can be fed: flour, water, salt, and yeast. (And that last one can be found and added naturally in the right conditions.)
Four ingredients? I could make bakery-quality bread — the very staff of life — in my own kitchen with just four ingredients?
The idea was planted in my mind, but I neglected to take action on it, and the inspiration went dormant. Then I interviewed Bo Pryor for our SYWMJ series, and I learned that part of his weekly routine is making bread with his children. The inspiration re-surfaced, I asked him for a recipe, and a new hobby was born.
I started out with Bo’s sandwich loaf. Then I made some easy French bread, a few Dutch oven boules (that’s French for “round loaf”), a baguette-style airy loaf — soon enough it became a weekly hobby of exploring various recipes and methods. And now, just a few short months later, I’m making sourdough bread, English muffins, dinner rolls, etc. It’s really quite an easy learning curve.
Below, I present Bread Baking 101: guidance and recipes for very beginners — folks who may have never baked anything in their whole life — on how to make bread at home. I guarantee you’ll end up with a bakery-quality loaf from your very own oven.
The Benefits of Baking Your Own Bread
If you’ve never thought about baking your own bread before, why consider starting? Here are 3 reasons:
It’s healthier. Take a look at the ingredients list of any pre-packaged bread you buy at the grocery store. You’ll find a bunch of unpronounceable chemicals and preservatives. Your homemade bread will literally just be flour, water, salt, and yeast. There may be added accoutrements like cheese, herbs, dried fruits, etc., but the base of your loaves will be built on a simple foundation of four ingredients. While bread is calorie-rich and not particularly healthy in general (at least in the modern age where you’re typically not burning off all those carbs), if you’re going to eat and enjoy it, homemade is the way to go. I actually appreciate that my bread starts to harden and mold after a week — just like real, unadulterated organic matter should.
It’s an easy way to impress friends/family, guests, and party hosts. Few things impress loved ones and other guests at a dinner party like a homemade loaf of bread. It has a certain magical quality about it that isn’t replicated in other foods — possibly because it’s one of mankind’s oldest cooked foodstuffs.
Plus, being that a man should never arrive empty-handed to a party, bread makes for something unique and wonderful to present to another host. Rather than a bottle of wine or a six-pack — as is the usual — show up to the door with a fresh loaf, and you’ll be sure to stand out. It’s also a nice gift because it can be served with dinner or other party treats, or it can be reserved to be enjoyed later on.
It connects you to your food, and rebels against big corporations. The vast majority of Americans these days are totally disconnected from their food. Everything we ingest is prepackaged, frozen, reheated in microwaves. And the giant corporations who manufacture all that “food” for us are making billions of dollars because we don’t know how and don’t want to take the time to cook our own.
Push back against the corporate behemoths and learn how to bake a loaf of bread. It’s incredibly satisfying not only to the taste buds, but to the soul, too.
Next, let’s go into the basic ingredients and supplies needed, and then into a couple recipes.
Ingredients Needed
The ingredients needed to make bread are incredibly simple, and you’re almost guaranteed to have the majority of what you need already at home.
Yeast. Yeast is the living organism that makes your bread dough rise and creates those lovely air bubbles in the crumb — without it, you’d have a flatbread or a tortilla. There’s a ton of complicated science behind yeast and what it’s actually doing in bread (and beer!), and if you’re looking for a good explanation, check out this resource library from Red Star. But for our purposes, just know that you need it, and there are two types of yeast usually found in the grocery store:
- Active Dry — yeast that is dry, granular in texture, and needs proofing — that is, it needs to be mixed with lukewarm (about 110° F) water to activate (beware: if the water is too hot, it will kill your yeast). This water/yeast solution is then added to your dry ingredients.
- Instant/Rapid Rise — with a finer consistency, instant yeast activates more quickly than “active dry” and doesn’t have to be proofed first — it can be put right in with your dry ingredients. “Rapid rise” is a variety of instant yeast to which enzymes have been added to help the dough rise faster.
There are other varieties of yeast — fresh and sourdough starter, namely — but the above two are all the beginning baker needs to know. Both kinds of yeast come in either packets or jars; if you plan on baking frequently, it’s worth getting a jar from which you can dole out perfectly portioned measurements (you’re not always going to need a packet-ful).
So which kind of yeast should you use? While each type will produce slightly different effects in your breads, and some bakers swear by active dry, they’re fairly interchangeable. Instant has the advantage of convenience in that it doesn’t have to be proofed and helps your dough rise faster (potentially saving 10-20 minutes of time). For that reason, I prefer instant. Just choose one type, get used to using it, and make it your go-to.
Flour. While any old all-purpose (white) flour will do, there are some variations to consider when buying flour for bread.
- Whole Wheat — whole wheat flour adds density, some sweetness, and additional health benefits to your bread. Many people also just prefer the taste of whole wheat bread over white. Know, however, that you can’t just substitute the same amount of whole wheat flour when a recipe calls for white. Doing 100% whole wheat flour without changing the loaf’s preparation techniques would give you a brick of bread — its properties don’t allow for the same fluffiness. Usually you’ll see 20-40% of the total flour being whole wheat, so I recommend only working with whole wheat when a recipe specifically calls for it rather than freestyling.
- Bread Flour — this is a variety of white flour, but it has a higher protein content. What does that mean for our purposes? It leads to better gluten development — the bonds formed by the water and flour are stronger. You end up with a really nice chewy and elastic structure. You can sub in bread flour 100% for any recipe that calls for all-purpose. It’s exclusively what I use for my loaves.
- Specialty Flours — when walking down the baking aisle at the store you’re bound to see other specialty flours like rye, semolina, oat, etc. As a beginner, stay away from these until you’ve gotten some experience. As with whole wheat, you’ll rarely, if ever, use these as 100% of the flour content in a typical loaf of bread, so don’t try it.
In conclusion, any all-purpose white flour will do. I like to use bread flour as a substitute, and it’s easily found in most grocery stores. Use whole wheat flour if the recipe calls for it. Stay away from the other stuff until later on.
Salt. Your basic table salt will do! I usually put 25-50% less salt in the bread than what the recipe calls for. I personally like to let the bread flavor come through pure, and then sprinkle some sea salt on top if I feel it needs it.
Water. I’ve always used tap water, and it comes out just fine!
Others. Many recipes call for additional ingredients to sweeten things or create a different type of texture. These can include milk (usually calls for whole), butter (usually calls for unsalted), oil, honey, etc.
Supplies Needed
Digital scale. If there’s one tool a home bread baker needs above all others, it’s a digital kitchen scale. Cheap versions are a little over $10; the one I use was $30. I’m sure the cheap ones work just fine.
Why do you need a scale versus just measuring cups? It’s almost entirely for the flour. When scooping flour out of a bag with a measuring cup, every person doing it (and every time you do it) will garner a scoop with a different density. The flour can get smashed down and then you get more than needed, or it can be a little too fluffy and you’ll have less than desired. In short, the cup of flour in a measuring cup is not always the same one cup of flour called for. With a scale, you’re getting exact amounts in grams. It’s just the better way to go.
Additionally, most bread recipes are written in either grams or ounces anyway, so your measuring cups wouldn’t do you a whole lot of good without having to do some math for every ingredient.
Mixing bowls. I tend to use more than one mixing bowl when I make bread, so have a couple clean and handy.
Measuring cups/spoons. Both liquid and dry, and for some recipes you’ll need spoons for down to 1/4 tsp or even 1/8 tsp (though not for the ones in this article).
Spatula/wooden spoon. Any will do.
Dutch oven. For the second recipe, a Dutch oven with a lid is needed. I melted the plastic handle off mine the first time, so a steel handle is preferred.
Two Beginner Recipes for a Great Homemade Loaf of Bread
These recipes are where, I believe, every home bread baker should start. They’re super easy, don’t require kneading, and produce a really amazing loaf. Once you feel comfortable working with the ingredients, stirring and transferring dough, etc., then you can move on to more advanced breads and techniques (which I’ll write about in the future!).
I’ve included the step-by-step pictures for the first recipe. The steps are similar for the second recipe, and really for all bread recipes. Mix dry ingredients, mix wet ingredients, form into dough, let rise, bake. That’s simplified, of course, but that’s the gist of it!
Easy Sandwich Loaf
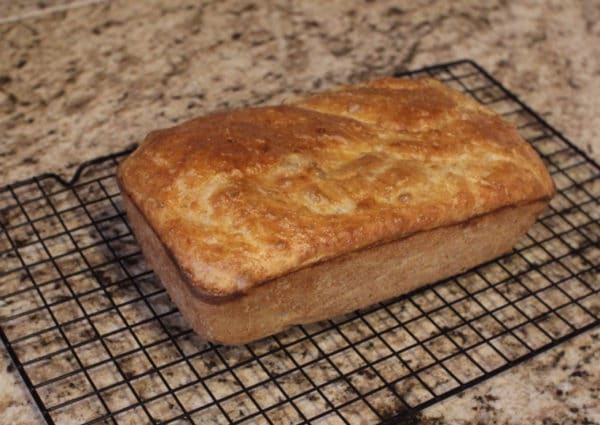
This is a classic sandwich loaf recipe, that adds some butter and honey for additional sweetness. You’ll need a loaf pan for this recipe.
Ingredients
- 310 grams flour (all-purpose or bread) – 2 cups
- 55 grams whole wheat flour – 6 tablespoons
- 7 grams yeast – 2 1/4 teaspoons
- 2 tablespoons unsalted butter, melted
- 14 grams honey – 1 tablespoon
- 4 grams salt – 3/4 teaspoon
- 1 1/4 cups warm water
Directions
1. In a large bowl, whisk together the flour, salt, and yeast, so it’s all well-incorporated.
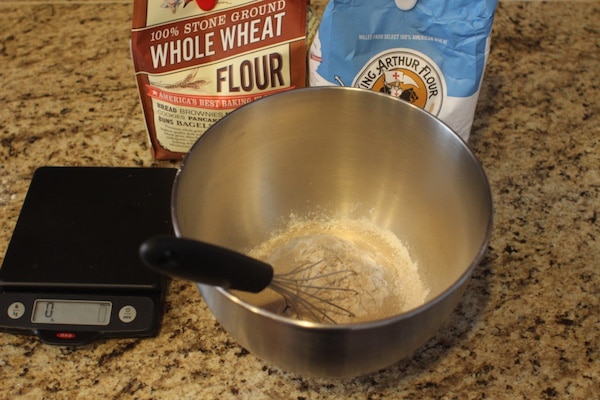
Whisking together dry ingredients.
2. Whisk together warm water, melted butter, and honey in liquid measuring cup until honey is dissolved.
3. Add the liquid mixture to the flour mixture and stir until the batter comes together. Then use the spoon or spatula to fold the dough over on itself 4-6 times until a more firm dough starts to form.
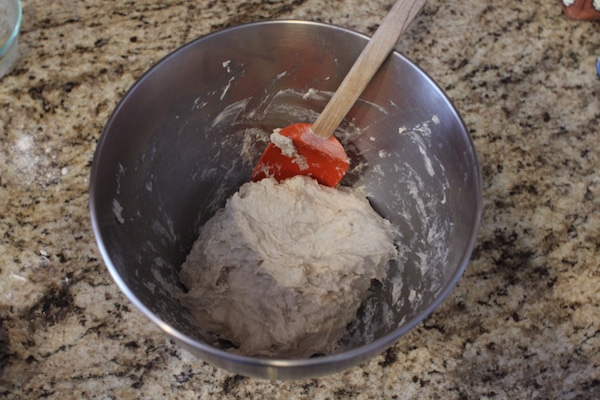
The dough is coming together after mixing the wet and dry ingredients with a spatula.
4. Cover tightly with plastic wrap and let dough rise until it’s about doubled in volume (30-40 min.).
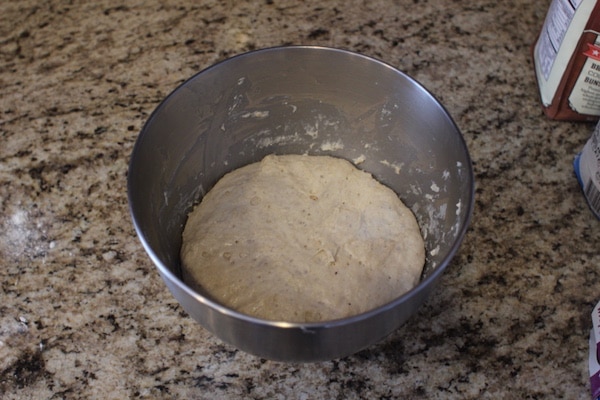
You can see the dough has about doubled in volume, filling some of the space of the mixing bowl. It’s also naturally smoothed out a bit. The bubbles are the yeast doing its job!
5. Preheat oven to 375 degrees, and grease your loaf pan (Pam for the win here!).
6. Transfer dough to the loaf pan, cover with plastic, and let rise until the dough gets to 1/2” below the lip of the pan. Uncover, and let rise until the dough is level with the lip of the pan. This should all take about 30-40 minutes.
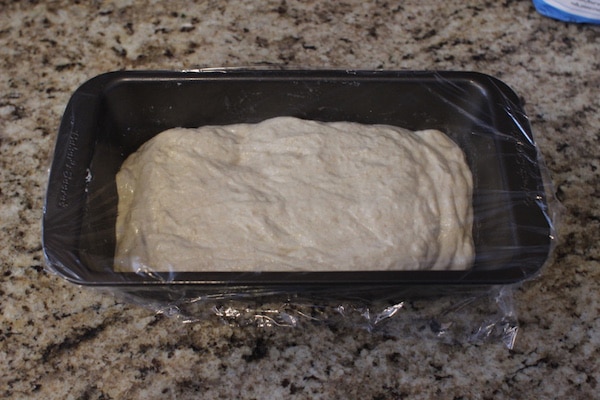
The dough naturally deflates some when transferring to the loaf pan. That’s A-okay. It can actually rise too much, in which case the loaf deflates when cooking.
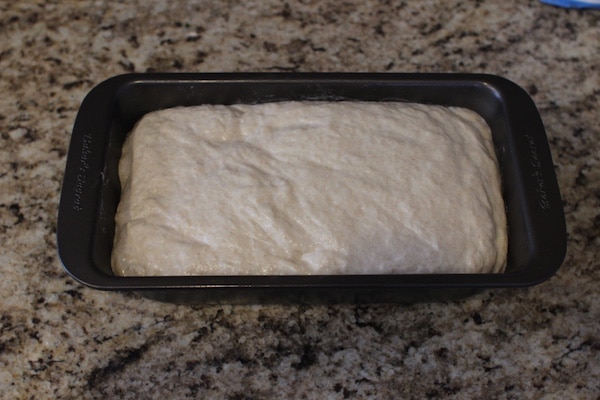
Almost ready for baking! Just a few more minutes.
7. Bake 40-45 minutes, until the top is a nice golden-brown. Let loaf cool in the pan for 15 minutes or so, before transferring to a cooling rack or cutting board.
8. Let cool for a couple hours before slicing and enjoying! If you cut bread too soon, the steam that’s still in there will escape, and the bread will dry out much quicker.
Dutch Oven Boule
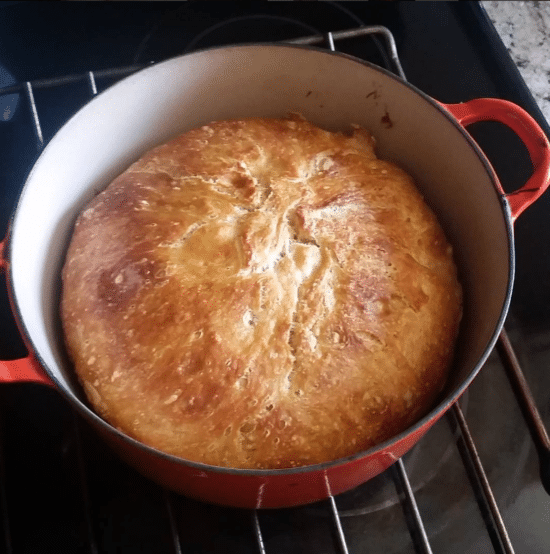
This recipe is stupidly easy, and it tastes amazing. This was my family’s favorite bread of mine before I recently got some speciality bread-baking tools (more on that in Bread Braking 201). This is an overnight rise, so start the bread the day or night before you’d like to bake it. Hardly any skill needed — just some time and attention.
Ingredients (I’ve included standard measures as well, in italics)
- 630 grams flour (bread or all-purpose) – 4.5 cups
- 18 grams salt – 1 tbsp
- 1 1/2 grams yeast – 1/2 tsp
- 2 1/2 cups lukewarm water
Directions
- In a large bowl, whisk together the flour, salt, and yeast, so it’s all well-incorporated.
- Add 2 1/4 cups water, stir until a sticky, pretty wet dough forms. If not all of the flour is incorporated, slowly add more water, a tablespoon or so at a time. This isn’t your standard dough; it’s very moist and would be impossible to form into any shape at this point.
- Transfer to a clean, lightly oiled bowl. Cover tightly with plastic wrap, and let it rise on the counter at room temperature overnight, or up to 24 hours.
- After the bread has risen, use a spoon to fold the dough over itself 4-6 times, deflating some of the air from it. Let rise another 2-3 hours.
- When you’re ready to bake, place your Dutch oven, with the lid, into the conventional oven. Preheat it to 475 degrees.
- When the conventional oven is preheated, pull the Dutch oven out (with oven mittens, please) and place it on the stovetop. Using a spoon, pour your dough into the hot dutch oven. It’ll sizzle a little bit.
- Place the lid back on, and put it back in the oven. Bake for 35 minutes with the lid on, then another 15-20 minutes with the lid off.
- Pull the Dutch oven out of the conventional oven, and let the bread sit in there another 15 minutes or so, before carefully flipping it over to get the bread out. The high heat ensured that the bread wouldn’t stick, so it should plop right out.
- Let cool for a couple hours before slicing in and enjoying!
For a whole wheat variation, use 420 grams (3 cups) all-purpose flour (or bread flour) and 240 grams (1.5 cups) whole wheat flour.
You can also add: grated cheese (1 cup, gruyere is excellent), dried fruit (1 cup, blueberries are my favorite), rosemary (1-2 tablespoons). These are all added between steps 1 and 2. Use your imagination and experiment!
______________________________
Sources/Inspiration
Cooked by Michael Pollan
52 Loaves by William Alexander
In Search of the Perfect Loaf by Samuel Fromartz
Bread Illustrated
Bread: A Global History by William Rubel
Bread Science: The Chemistry and Craft of Making Bread by Emily Buehler
Bake Magazine


