Editor’s note: This is a guest post from Darren Bush.
Today we continue our discussion of traditional firestarting with a primer on making fire from friction. Last time we talked about using flint and steel which is a really cool method and actually useful in real life situations. Fire by friction is more temperamental and requires more technique and more patience. It is a useful survival technique, but I don’t go out of my way to make fires this way on purpose. On the other hand, I use my steel quite often.
If you want to understand how fire by friction works, consider the time you slid down the slide at the playground and realized you were going way too fast. You tried to slow yourself down by grabbing the sides of the slide, but your hands soon became too hot to hold on. If you never had this experience, think about how warm your hands get sliding down the rope in the gym. Hot stuff, right?
Imagine concentrating all that energy into a small space. Properly concentrated, a little bit of friction can create a fire very quickly. The trick is patience, patience, and then more patience. “You can’t hurry love,” said Diana Ross. “You just have to wait. Love won’t come easy; it’s a game of give and take.” So is fire by friction. You can’t hurry fire.
The Theory
To create a fire you need heat, fuel, and oxygen. The heat is supplied by friction between the spindle and the hearth board. The fuel is supplied by the hearth board eroding and creating punk: fine, dark brown powdery stuff. The oxygen is provided by Mother Nature. Simple as that.
The Equipment
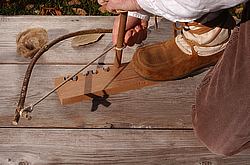
The hard part is choosing the right materials for a spindle, a hearth board, and a bow. Hearth boards are best made of a softer wood like cedar. I use old shakes; they work great. I have also used cottonwood and willow in a pinch, but nothing smells as good as cedar when you’re starting a fire. Some like catalpa wood.
Spindles should be long, straight pieces of wood. In the west, folks often use mule fat (the bush, not the equine lipid). Horsetail works well too. I find that a good cedar or fir spindle works great. It should be about 9 or 10 inches long and the same thickness, about ¾ to 1 inch, throughout the length of the spindle. If the thickness varies, the string will crawl toward the narrow part of the spindle.
The bow should be a flexible piece of wood with enough spring to maintain tension on a piece of rope. I use willow limbs, but you can use a number of things.
The socket (the top part of the whole equation) should be a harder wood like walnut or oak and should be comfortable to hold. I have used elm or ash; my current socket is half a piece of ash. Osage orange is wonderful and is good for a bow as well if you can get a nice piece bent in the right place.
The Technique
First, grease the top of your spindle. I rub it in (what’s left of) my hair, behind my ears, along my nose, anywhere there are skin oils. If you have some fat, soap or grease, a little dab will do. That means the spindle will NOT have friction on the top but will on the bottom, where it meets the hearth board.
There is a definite technique for holding the bow and drill successfully. For right-handed people, use the directions that follow. For left-handed people, reverse everything. Place your left foot on the left side of the hearth board and the indentations on the right. The cord should twist around the spindle once, and position the bow and spindle so that the business end of the spindle is facing down, the arc of the bow to the right (away from your knee). Hold the socket in your left hand and steady your left wrist against your left lower leg. Move your right foot back from the hearth board a bit, and place the lower end of the spindle in the hearth board where you want an indentation.
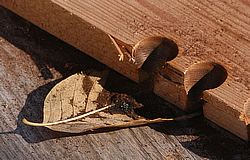
Now you’re ready to make an indentation. Pick a spot where the diameter of the spindle lines up with the edge of the hearth board. Then, rotate the spindle slowly and wear away a little dimple, and you’ll see some smoke. When you wear away a large enough dent to hold the spindle easily in the depression, stop and use your knife to cut away a small notch, almost to the center of the spindle dent. This allows the punk dust to fall out of the hole, but it also provides an edge where heat can really build up and eventually cause the punk to ignite. Place a leaf or other small flat object under the notch to catch the fruits of your work.
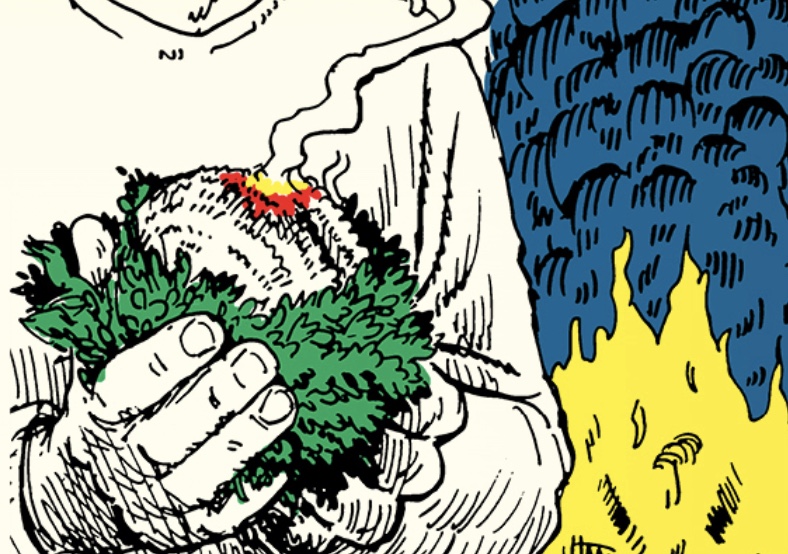
The trick is slow, methodical, rhythmic movements. Don’t push down super hard, don’t go super fast, just nice and easy does it. You will see punk start to pour out of the notch and land on the leaf or piece of bark collecting the punk dust. Smoke will waft up and smell really good. When you see a good amount of smoke, stop and look at the punk. If it continues to smoke, congratulations! You have a coal in your punk! Now place the coal in your prepared tinder bundle, and blow gently until the coal catches the tinder and bursts into a happy flame.
The Hand Drill
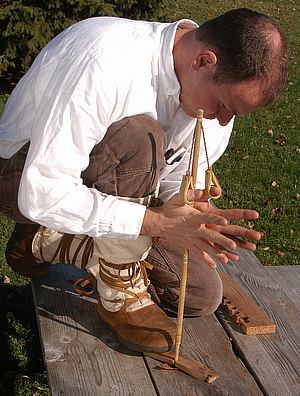
The hand drill is nothing new, but it’s much harder. The thumb loops are a modification by wonderful artist/primitive skills advocate Dino Labiste. The concept is identical, except you need to use your thumbs to apply downward pressure. The spindle is not consumable, so small pieces of wood are carved into “bits” you place in the spindle. Same rules apply–slow, methodical and rhythmic movements, no speed demons or anything like that. Patience wins.
For more information about primitive fire by friction, check out www.primitiveways.com. If you’re interested, you can purchase fire-by-friction materials there. It’s a blast. I especially enjoy the contest to build the smallest fire-by-friction set.
_____________________________________________________________
Darren Bush is the owner and Chief Paddling Evangelist of Rutabaga, but he’s also an amateur blacksmith, longbow shooter, and primitive skill aficionado. He believes primitive skills are highly undervalued in modern society.


