While much of the world is in quarantine of some form, and often sequestered with children who are itching for something to do, we thought it would be fun to offer a weekly craft/project idea you can work on together to help while away the time. If you make the craft, we’d love to see it; share on social media with the hashtag #aomkidcraft.
Catapults have been around for a long, long time. Some records peg their first appearance to the 3rd century BC in China. Others say the Greeks were the first to launch projectiles into the air. Adding to the confusion is the sheer variety of catapult styles, ranging from creations like trebuchets to machines that looked more like giant crossbows than traditional catapults.
One thing they all have in common is how they work. All catapults function by storing energy, usually through tension, and then releasing it in a way that launches a projectile over a great distance. The biggest medieval catapults could launch 300-pound stones over 1,000 feet.
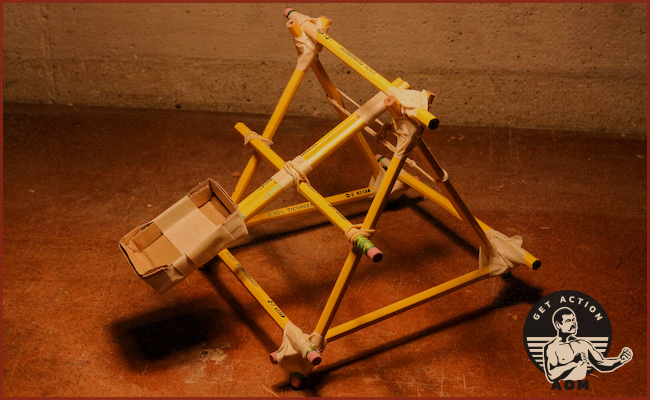
Replicating a full-size medieval catapult is probably beyond the scope of a craft project for kids, but that doesn’t mean you’re out of luck. If you’ve got a dozen pencils, some masking tape, and a few rubber bands, you’re well on your way to creating your own miniature version. Building one is easy and offers a great opportunity to teach kids about basic building principles, how levers and springs work, or even more advanced ideas, like the shape of a parabola or how potential energy works. But really, learning opportunities aside, they’re mostly just a lot of fun to make and play with!
Below is how to construct your own. These instructions have a specific set of materials, but there are lots of options for substitutions if you don’t have these things lying around. For example, you could use a spoon or measuring cup in place of the cardboard box, string instead of rubber bands, and any type of tape.
How to Make a Pencil Catapult

Supplies
- Scissors
- Small piece of cardboard
- Rubber bands
- 12 pencils
- Masking tape
Step 1: Make a Pencil Triangle

Arrange 3 pencils into an equilateral triangle. For extra stability down the road, make sure at least one side of your triangle has two eraser ends pointing down. The erasers will act as grippy feet for your catapult.


Use rubber bands to bind them together where they meet at the corners.
Step 2: Reinforce the Triangle


Lock in your triangle’s shape and pencil position by reinforcing each joint with a narrow strip of masking tape.
Step 3: Make Another Triangle

Repeat steps 1 and 2 to make another identical triangle. These will act as your main catapult supports.
Step 4: Connect the Supports (At the Top)


Span the top of your catapult supports by taping another pencil from peak to peak. No rubber band needed here.
Step 5: Connect the Supports (At the Bottom)

Repeat step 4, but at the bottom of your catapult supports. Again, no rubber bands needed, just tape.
Step 6: Attach the Pivot

Attach a pencil halfway up one side of your supports using rubber bands.


Start by hooking one end of the rubber band around the pencil’s end, then wrap it around both pencils until it’s tight and you can hook the remaining end.

This is the pivot point which will attach to your catapult’s arm.
Step 7: Make the Catapult

Fasten two pencils together using masking tape. This will act as the arm of your catapult. Binding it at multiple points will help make it stronger.
Step 8: Attach Catapult


Attach your catapult arm to the middle of your pivot point using a rubber band.
Step 9: Connect Rubber Bands


Connect two rubber bands with a simple hitch knot.

Stretch them across your catapult supports opposite your pivot arm. Tie the ends together. Depending on the size of your rubber band, you may need to connect three or more rubber bands to span the distance.
Step 10: Make the Launcher

Cut out a square of cardboard approximately 3 by 3.5 inches. Cut small slits into each side and fold up the middle.


Then, fold the ends up and wrap the tabs around, securing them with tape to create a small box for your projectile.
Step 11: Attach Launcher to Catapult


Use tape to attach your cardboard box to the end of your catapult’s arm.
Step 12: Launch!
The idea for this craft came from The Double Dangerous Book for Boys.
Here are some more fun, kid-friendly projects to keep your family busy:


