Editor’s note: This is a guest post from Stratton Lawrence.
Before reading another word of an article about how to build a man-sized slip-‘n-slide, it’s important that you, Sir Reader, acknowledge something. A slip-‘n-slide is an invitation to get cantaloupe-sized bruises on your hips, shoulders, etc. When you run at full speed and then hurl yourself onto the ground, there’s going to be some collateral damage. So, if you build one of these, the risk is entirely yours. If you drink while doing this, you will almost certainly get hurt.
That said…
What fun worth having doesn’t involve a little pain? And with a slip-‘n-slide, you’ll probably walk away in better shape than if you start a fight club in your garage.
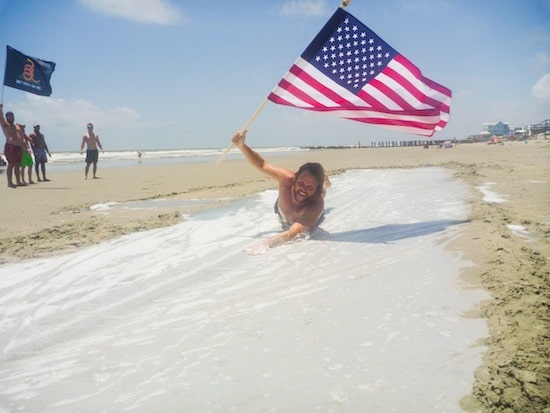
Where I live in South Carolina, the Fourth of July is synonymous (to my friends and I, at least) with “giant slip-‘n-slide” and “keg buried in the sand.” By the time fireworks roll around, we’ve already crammed a week’s worth of fun into an afternoon. To make that type of good time possible, you’ve got to get the right group of people together. And to get that group together, you’ve got to provide a focal point — the kind of thing that people will witness and immediately text and call their friends about until the whole neighborhood shows up to give it a go.
Presenting, the Man-Sized Slip-‘n-Slide.
Fortunately, it’s easier to build than you might think.
Supplies
1. Roll of Thick Plastic Sheeting, 10 Feet x 100 Feet
This is your biggest expense (alongside the detergent, depending on what you get), and should run you about $60. Here’s an example of what you need, although any legitimate hardware store should have a similar product.
Tip: Don’t skimp by opting for a thinner plastic. You want the thickest plastic you can find (look for 6 mil) in order to prevent tears from seashells, rocks, etc., and to provide a little bit of extra protection for you and your friends from anything hard and sharp below.
2. Shovel
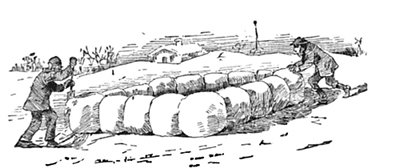
We make our slip-‘n-slide on the beach, which is the easiest way to do it. Using the shovel, it takes about half an hour to secure the sides of the tarp by burying them slightly and then piling sand along the edge.
If you plan to try this in a grassy area, you can use tent stakes, but you will want to push them all the way into the ground so that they don’t protrude at all, for obvious safety reasons.
3. Lubricant
To make sure you slide after you slip, you’ll need a generous layer of slime across your plastic. The first year my friend Mark Davis made a slip-‘n-slide (the man who deserves credit for showing me how to do this), he used baby oil, which worked great but made for a greasy day. We’ve since moved on to dish soap.
It’s worth spending a little bit more for an environmentally friendly soap (and if you’re building a slip-‘n-slide anywhere near a fresh water source, consider that mandatory). A gallon of Dr. Bronner’s liquid castile soap will run you another $64, but you can dilute it and make it last all day, and walk away knowing that you didn’t pollute the ocean or your local river. Plus, your hippie friends need a bath once a year, anyways.
A cheaper but still safe alternative is Dishmate detergent by Earth Friendly Products, and at $15 a gallon you can buy a few and really keep the party going.
And, of course, any detergent works. But if you do this near water or in a public place with tons of questionably toxic soap, you probably deserve any complaints lodged your way.
4. Water
In an ideal scenario, you’ll have access to a hose that can run at a trickle throughout the day, keeping your slip-‘n-slide wet and ready for the duration. If you’re buying one, get a long one, or a few that can easily connect to each other. Last year, I rented a beachfront house and was able to hook three hoses together to run all the way into the sand. In previous years, however, we’ve just used a bucket brigade. If you’re on the beach, bring a few buckets so you don’t have to constantly fill them up, and just add a little bit of water after every ride.
How to Make the Slip-‘n-Slide
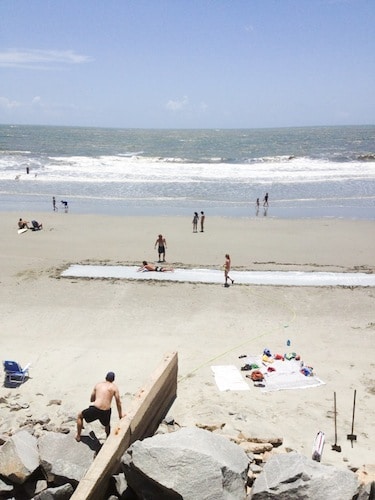
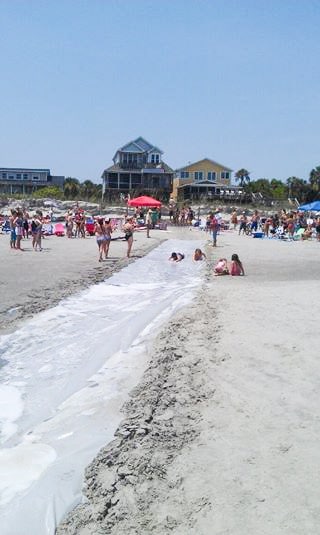
Building the slip-‘n-slide is easy. Begin by choosing your spot. You’ll want a flat space 10 feet by 100 feet, plus about a 40-foot “runway” on one end. Carefully and slowly walk the entire area and remove any sharp or hard objects that could rip the plastic or hurt when you’re sliding over them at top speed.
Once the area is clear, roll your plastic out. Either bury the edges or carefully stake it down (again, stakes ALL THE WAY into the ground so that they don’t protrude at all). Start with a generous soap application along the entire length of the plastic, and then give it a light watering.
You’re ready to go!
When you add soap throughout the day, it’s generally okay to put it just at the “take off” area. Your sliders will spread it for you.
It’s also smart to have a few rules:
- Don’t stand on the slip-‘n-slide or try to ride on your feet. That’s just dumb and you will fall and hurt yourself.
- One person rides at a time. Seriously, with 100 feet of sliding space, you’ll be going a lot faster than you expect, and flying limbs (or elbows to the face) produce more serious bruises than the ground.
- If you drink, don’t slide. Drunk and bruised is no way to go through life, son.
Optional Addition: Although I’ve never tried it myself, I don’t see any reason you couldn’t add a kiddie pool to the end of the slip-‘n-slide, perhaps even with a sprinkler to truly replicate that giddy feeling you had as an 8-year-old on an afternoon of slipping and sliding in the backyard. With 100 feet of plastic, sliders generally slow down and stop by about 80 feet, so there’s been no need for a landing pool in our case, but maybe with a slight decline, you could make it all the way. If you try it, send us a picture!
____________________________________
When he’s not hiking in Appalachia or paddling the creeks around Charleston, SC, Stratton Lawrence writes about travel, outdoor adventure and fitness for eBay.


