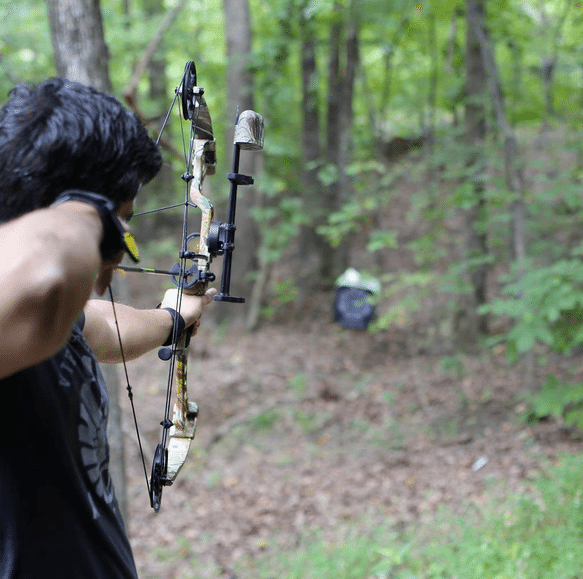
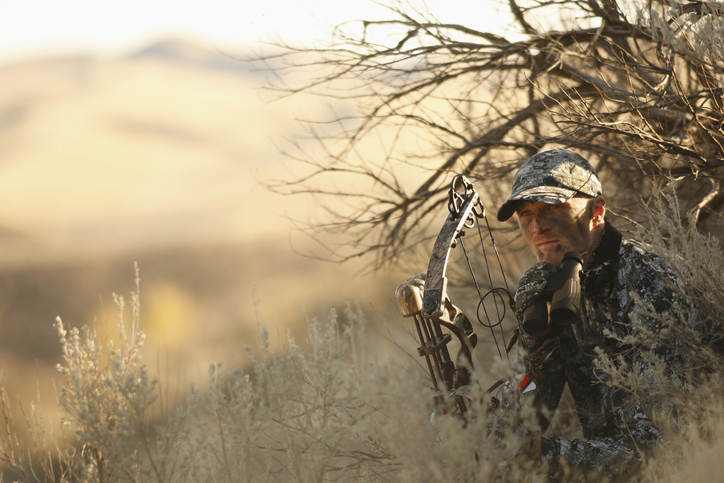
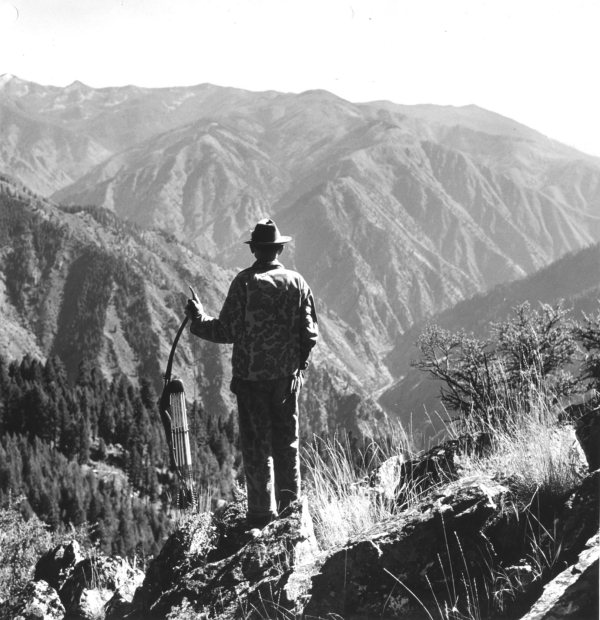
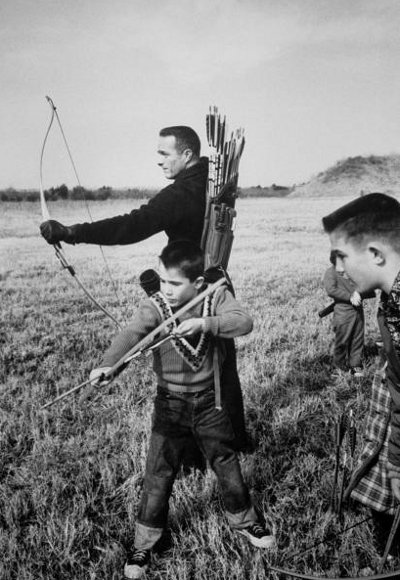
For the longest time, one of my goals has been to go on a deer hunt. It’s one of the skills that men throughout history have honed in order to provide for their families, which is a foundational pillar of manliness. This fall it looks like I’ll finally be taking to the woods and fields to learn this ancient skill. Brooks Tiller of Orion’s Kin will be acting as my guide, and we’ll be bow hunting. The season is longer, and I like the fact that in order to harvest a deer, I need to be able to stalk so I can get close enough to the animal to shoot it with an arrow. Hopefully we’ll have a successful hunt so that I can fill my freezer with piles of delicious venison.
The odds are admittedly stacked against me though, as I’m pretty much a complete newbie when it comes to archery. The last time I used a bow was when I was 14 years old at Boy Scout camp. I’ve thus naturally been keen to practice up before the hunt. When I went to a Bass Pro Shops a couple months ago in order to get a bow and get started with it, I thought it would be easy to just pick one out and be on my way. But I quickly found myself overwhelmed by the selection and all the gizmos and accessories you can buy for a compound bow.
So I took a step back and gave Brooks a call to ask what exactly I should be looking for. I also did some research on the lingo that you’ll likely encounter when making this purchase. For the benefit of other men out there who know nothing about compound bows, but are thinking about investing in one, today I’ll share everything I’ve learned.
Why Choose a Compound Bow For Hunting?
I can already hear the traditional bow enthusiasts collectively saying, “Compound bows?! What’s manly about using a bow with some wheels? It’s much manlier to just use your own strength to pull a bowstring back. Using a recurve or longbow is the only way to go.”
And I agree with this sentiment…to an extent. There’s something indeed very manly and primal about using the same weapon that hunters have used for thousands of years.
But the compound bow has its virtues too. If you’re a beginner hunter, the compound doesn’t have as steep a learning curve as a traditional bow. This is in part because using a traditional bow requires a significant amount of skill and strength to shoot accurately, and this takes lots of practice to develop. Additionally, the compound bow allows for much greater accuracy and speed without the need to spend hours upon hours practicing. Yes, you’ll still need to practice with your compound bow, just not as much as if you were to use a longbow or a recurve.
For many folks, the compound bow is the gateway into bow hunting that leads them to eventually try out traditional bow hunting. I can safely say that practicing with my compound has only whet my appetite to one day try my hand with a longbow.
The Anatomy of a Compound Bow
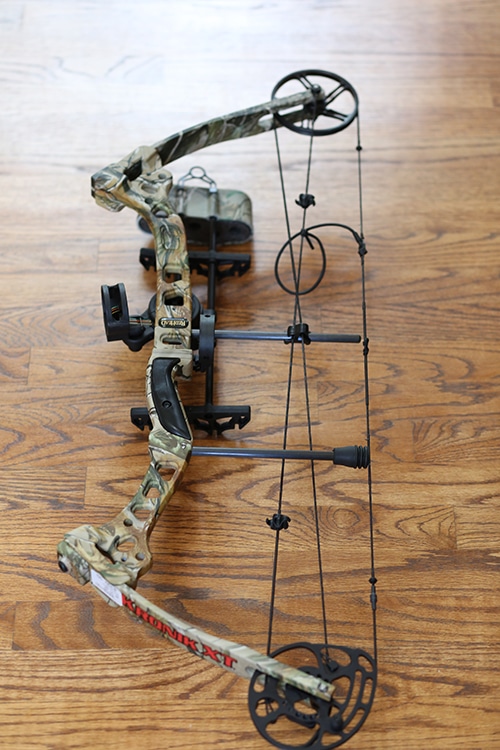
My bow is a RedHead Kronik XT. They’re available at Bass Pro.
Unlike longbows and recurve bows, compound bows have a lot of moving parts, so it can be pretty intimidating for the first-timer. It’s nice to have a basic understanding of all the parts on the bow, so that when you go in to talk to a salesman at a store, you’ll have a good idea of what he’s talking about when he says you should get a bow with a “single cam.”
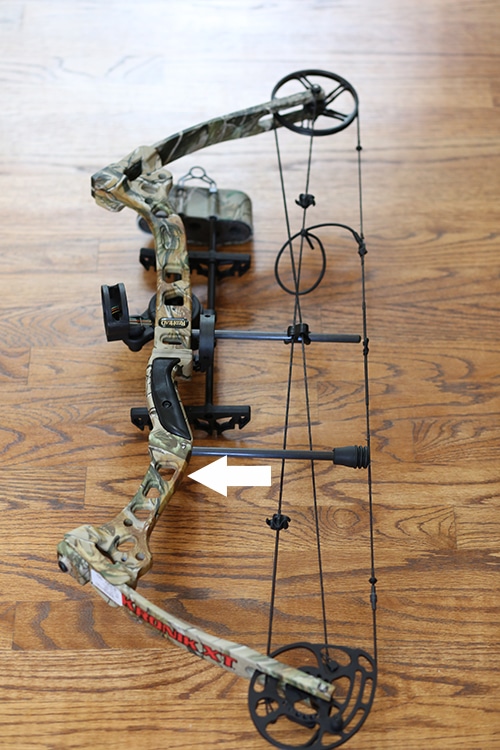
The riser.
Riser. The riser is the middle part of the bow that contains the grip. The arrow shelf and sight is also mounted to the riser. Risers are typically made of aluminum, but high-end compound bows use carbon fibers to decrease the overall weight of the weapon. Several of the bow’s accessories are mounted to the riser, including the sight, arrow rest, quiver, and stabilizer.
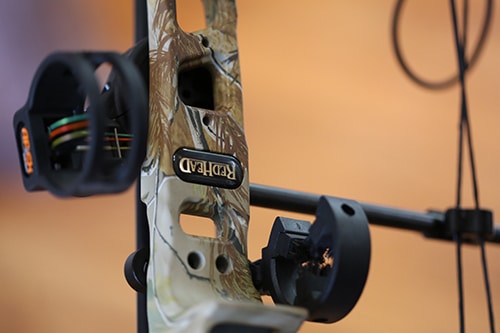
Sight and arrow rest attached to the riser.
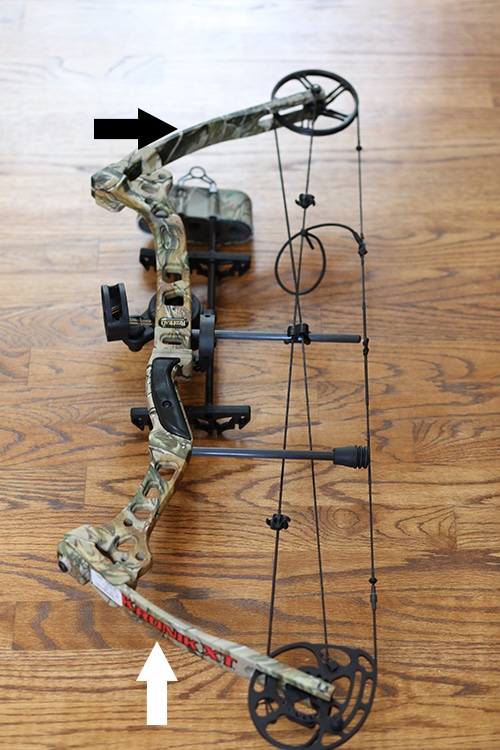
Limbs.
Limbs. The limbs are flexible fiberglass planks at the top and bottom of the bow; they attach to the riser. Attached to limbs are the cams (more on that in a bit). The bow’s limbs are what store the energy that you generate when you pull back the bowstring.
Limbs come in different styles. Solid limbs are made from just one piece of fiberglass. Split-limbs are made up of two thin limbs connected at the riser. The advertised advantages of split limbs are that they’re more durable and produce less hand shock than the solid variety.
Parallel limbs represent yet another style, and are found on most hunting compound bows these days. In fact, if you go to any major outfitter with hunting bows, most of them will have parallel limbs. Instead of having the traditional “D” bow shape, those with parallel limbs have the bottom and top limb parallel to each other. It’s easier to see than to describe. Take a gander at the picture below to see the difference between a bow with and without parallel limbs.
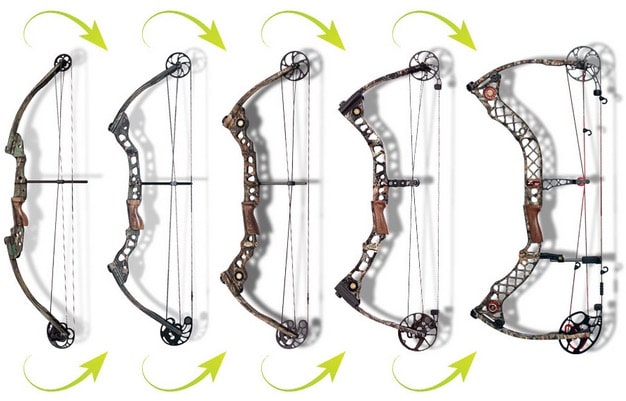
Traditional bow shape on the far left, progressively becoming more and more parallel as you move right.
The advantage of parallel limbs is that they’re quieter and have less recoil when you release the bowstring.
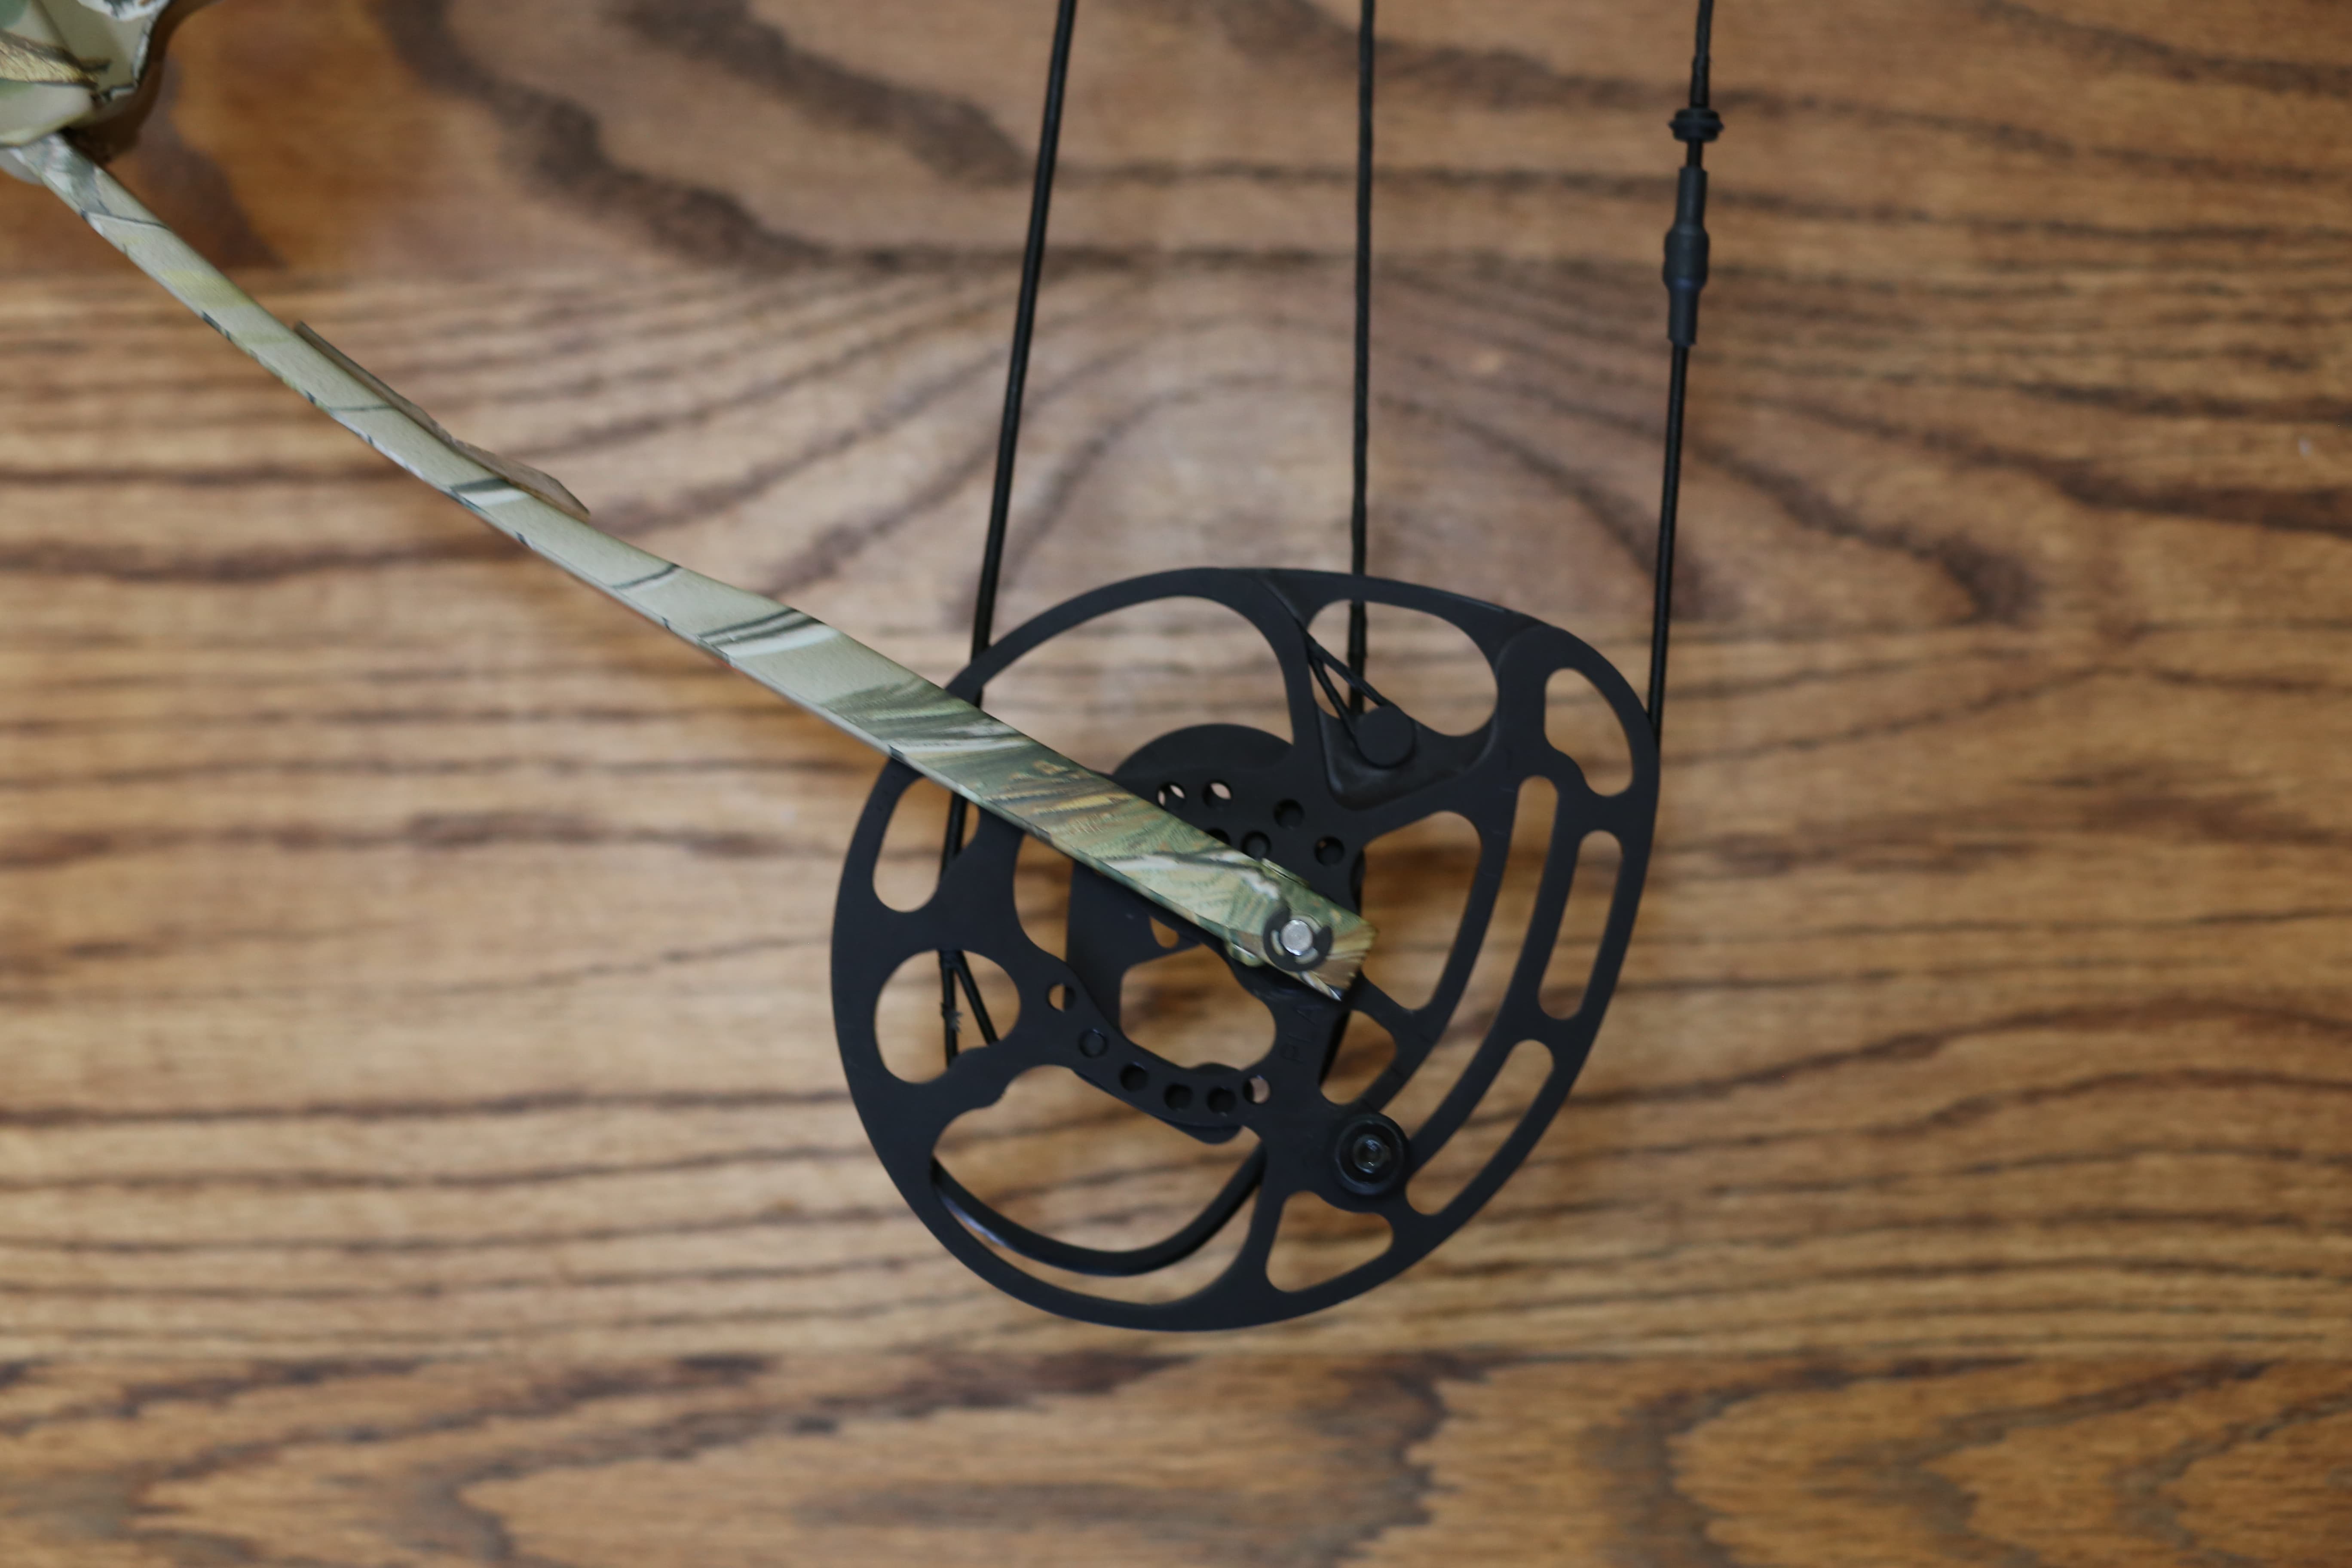
Bottom cam.
Cams. The cams are the round or oval disks that are attached to the end of the limbs. They’re what make a compound bow a compound bow. With a traditional bow, the further you pull the string back, the harder it gets to pull back. Cams mechanically manipulate the draw weight of the bow as you pull the string back, so that past a certain point, it gets easier to pull back, even though you still maintain the same amount of stored energy you’d have if you were using a traditional bow.
There are different types of cams — round wheels, soft cams, hard cams, single (solo) cams, and 1.5 hybrid cams. Each one has its distinct advantages and disadvantages. For example, round wheel cams produce a slower arrow speed, but provide much more accuracy than others. Hard cams can produce fast arrow speeds, but they’re harder to keep tuned.
Cam Systems. Cams are the individual wheels on a compound bow. Cam systems are how the wheels work together. There are four types of cam systems: single cam, hybrid cams, binary cams, and twin cams.
Most starter compound bows come with a single cam system, and they’re the most popular on the market today. It consists of a round idler wheel on the top of the bow and an elliptical-shaped power-cam on the bottom. Single cam systems are quieter and easier to maintain than the others. If you’re just getting started with compound bow hunting, make it easy on yourself and get a bow with a single cam system.
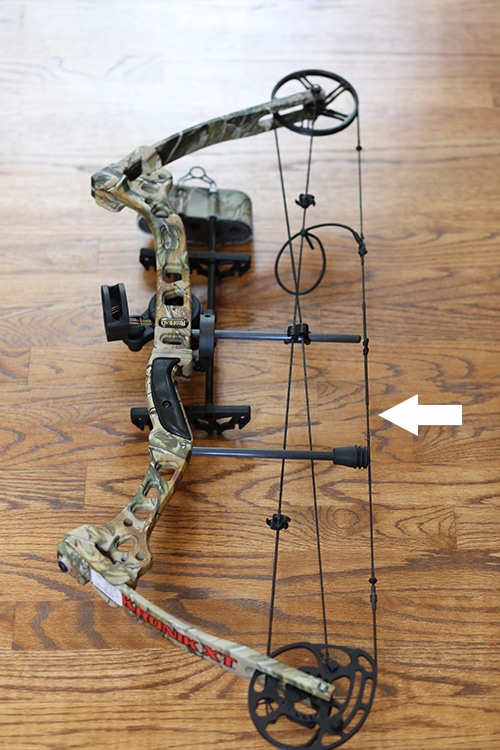
Bowstring.
Bowstring. The bowstring is what launches the arrow. Most modern bowstrings are made of man-made materials that do not stretch out and lose tension over time. If you’re using a mechanical release (see below) the bowstring will have a “D-loop” where you attach it.

Cables.
Cables. Cables run from cam to cam and are what move the cams when pulling back the bowstring.
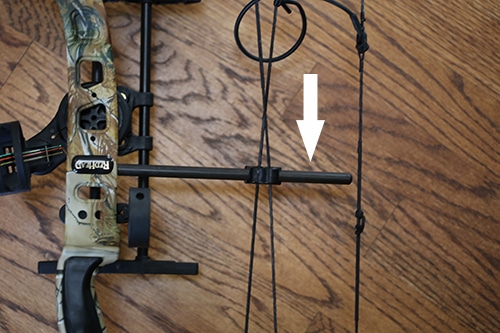
Cable guard.
Cable Guard. The cable guard is a fiberglass rod that runs perpendicular to the riser. It works with the cable slide to keep the cables away from the center of the bow and out of the arrow’s line of fire.
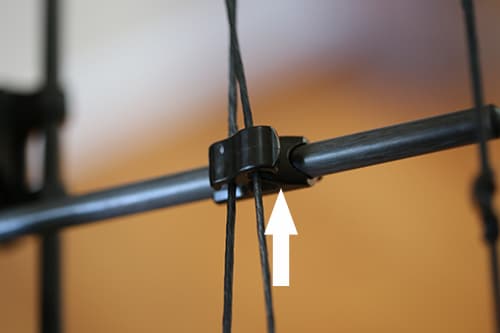
Cable slide.
Cable Slide. This is a small plastic piece that is attached to the cable guard and then mounts to the cables. The cable slide, along with the guard, helps keep the cables out of the arrow’s path.
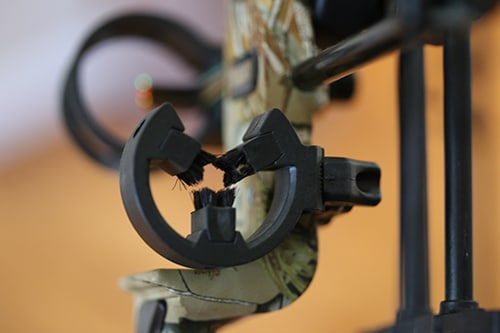
Containment arrow rest.
Arrow Rest. As the name implies, it’s where you rest your arrow as you prepare to release it. There are a variety of arrow rests on the market. You’ll likely find what’s called a containment rest on a starter compound bow. A containment rest totally encircles the arrow and holds it in place until shot. You don’t have to worry about where the arrow is resting on the arrow rest, which means you can focus all of your attention on your form and your target.
Other types of arrow rests are the drop away, the shoot-thru, and the pressure. If you’re a beginner, go with the containment variety. As you get more into bow hunting, you can try out the other kinds.
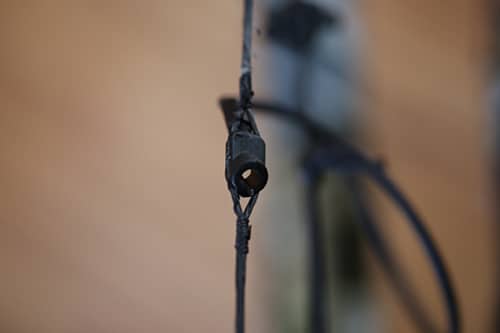
Peep sight.
Peep Sight. The peep sight is a donut-shaped piece of plastic that’s inserted between the strands of your bow string. When you pull the string back, you look through the peep sight and to the sight to aim.
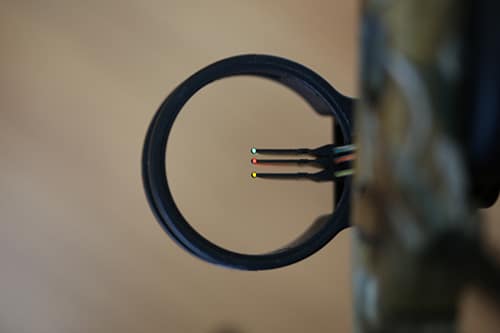
Fixed pin sight.
Sight. The sight attaches to the riser and helps you aim your bow. Sights on a bow work somewhat like they do on a gun. There are different kinds of sights, the most common type being the fixed pin. A fixed pin sight has three to five pins in the sight circle that are set for a known distance. So for example, you can set the top pin for 10 yards, the middle for 20 yards, and the third pin for 30 yards. You’ll need to know the distance to your target to get the full advantage of fixed pin sights. There is a device called a range finder that can measure distances, but with lots of practice, you can learn to judge distances simply by eyeballing them. The beauty of fixed pin sights is that even beginners can get really accurate shots when used correctly.
Other sight types include movable pin sights and pendulum pin sights. Both have a single pin instead of multiple. The advantage with them is that they’re easier to adjust on the fly when you don’t know the distance of your target. The downside is that you have to be pretty good at estimating distances to get the full advantage of them.
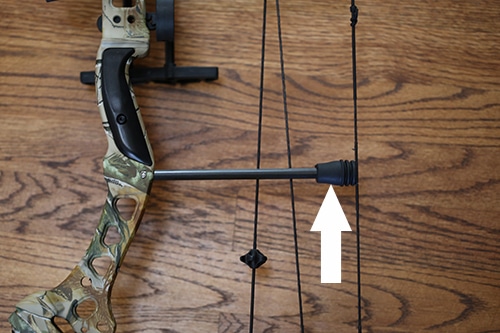
String vibration arrester.
String Vibration Arrester. The string vibration arrester is attached to the riser and sits close to the bowstring. It absorbs vibration during your shot to help reduce sound.
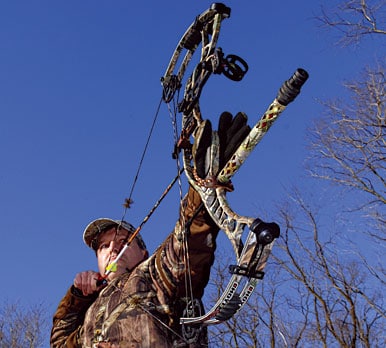
Stabilizer on the front of the bow.
Stabilizer. This is an optional piece for your bow. It’s a rod that attaches to the front of the bow just below the grip. The stabilizer helps keep your weapon steady while shooting, as well as reduces vibration and noise. I tried shooting with a stabilizer and didn’t notice that much of a difference, but some hunters swear by them. Try one out at the archery shop before you decide to buy it.
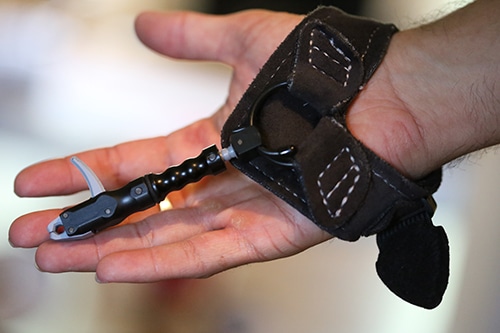
Mechanical Release. With compound bows, you can pull back the bow the old-fashioned way with your fingers, or you can use a mechanical release. A mechanical release is a device you wear on the hand and wrist that you use to pull the bowstring back. There’s a small little clip on the mechanical release that you attach to the string; you pull it back, and when you’re ready to shoot the arrow, you simply pull a trigger on the mechanical release that opens the clip and releases the bowstring. It’s much like shooting a gun.
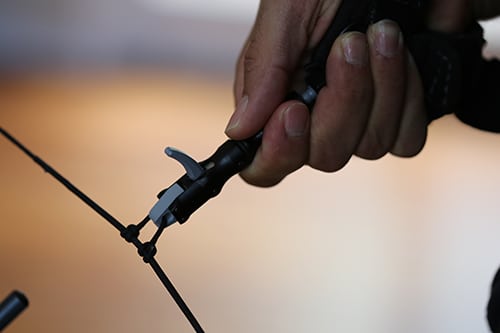
Mechanical release attached to the “D-loop” on the bow string
Most hunters use a mechanical release because it makes shooting much easier.
Know Your Compound Bow Lingo
Besides the parts of a compound bow, here are some terms you should be familiar with when you go into the shop to pick out your bow.
Draw Length. Figuring out your draw length is one of the most important things you do when getting fitted for your bow. You don’t want your draw length to be too short or too long.
To understand draw length, you need to first understand one of the differences between compound bows and recurve/longbows. Unlike longbows and recurve bows which can be drawn back pretty much as far as your strength allows, the string of a compound bow has a set distance to which it can be drawn back (this set distance can be adjusted on the bow with tools). The distance you can pull a compound bow before it stops is called the draw length.
Not only does your bow have a draw length, you have a draw length as well. One of the jobs of a good bow outfitter is to fit these two measurements together. It’s sort of like trying on shoes. For example, let’s say a bow has a draw length of 29″ but you have really long arms. When you pull the bowstring back, you’re not going to be able to pull back very far, and you’re going to feel really uncomfortable. The bow’s draw length is too short for you. On the other hand, if a guy with short arms uses the very same bow, he’ll have to really stretch his arm to fully draw back its string. This bow’s draw length is too long for him. For comfortable and accurate shots, you need to match your frame to a bow’s draw length.
There are different ways to determine your draw length. The most common way to do it is to measure your wingspan (finger tip to finger tip when your arms are outstretched horizontally from your body) and divide by 2.5. So if you have a 72.5″ wingspan, your draw length would be 29″ (72.5 / 2.5).
Draw length is also important to know because it will determine the length of arrows you buy.
Draw Weight. Draw weight is simply the amount of force required to pull back the bowstring. It’s measured in pounds. Most compound bows for adult men can have the draw weight adjusted from 40 to 70 lbs. You can buy bows that allow for even higher draw weights.
A heavier draw weight increases arrow speed and penetration ability. But a beginner doesn’t need to start off with a 70 lb draw. You’ll sacrifice accuracy in the name of power. Instead, begin with 40 lbs of draw, and slowly work your way up to a heavier weight that allows you to shoot without sacrificing accuracy.
One thing to keep in mind is that most state hunting laws require that your bow have at least a 40 lb draw weight for deer hunting. This ensures that your arrow will have enough force to penetrate the hide and actually kill the deer instead of just pocking him with flesh wounds. Minimum draw weights will increase as the animal increases in size.
FPS. FPS means “feet per second.” This refers to how fast an arrow travels after leaving your bow. Related to FPS is IBO Speed. The International Bowhunting Organization established a standard for measuring compound bow speed, which means your bow will have a designated IBO speed.
In the past few years, bow and arrow companies have heavily advertised arrow speed, making it seem that it’s the most important feature on a bow and an arrow. However, most bow hunting experts agree that when it comes to harvesting a clean kill, arrow speed isn’t as important as these companies make it out to be. Rather, an arrow’s momentum, or ability to penetrate a deer, is more important. Getting good momentum sometimes requires sacrificing arrow speed by using a heavier arrow, for example. This isn’t to say you should completely ignore arrow speed on a bow, just don’t make it your top priority when picking out your weapon.
Let Off. “Let off” refers to the reduction in draw weight that occurs when you pull the bowstring on a compound bow all the way back. Let off is articulated in percentage. So if a bow has a 70% let off, and the draw weight on it is 60 pounds, when the bowstring is pulled all the way back, you’ll be holding about the equivalent of 18 pounds.
How to Buy a Compound Bow
Have a budget. Bow hunting can get really expensive, really fast. So set yourself a budget before you start throwing money around. If you want to buy new, look to spend at least $500 for a completely rigged starter bow, a mechanical release, and some arrows.
If you want to save some money, you can buy used from Craigslist or other online forums. If you’re a beginner, I’d recommend taking a buddy along who knows something about bows to make sure you’re not buying a lemon.
Go to an archery shop. Ideally, you’ll want to go to a shop that specializes just in archery. You’ll find staff who will know how to fit a bow to you and they’ll have a range where you can test out your bow before you buy it.
If you don’t have a specialized archery shop near you, a big box store like Bass Pro Shops will have dedicated archery specialists who can help find the right bow for you. That’s where I went to get mine, and friendly AoM reader Sean Billups spent a little over an hour helping me pick out my bow and adjusting it so that it fit me just right. Bass Pro also has a range near their archery section where you can test and sight your bow.
Even if you decide to buy used, you’ll want to take your bow into an archery shop so that you can have it adjusted for your particular frame.
Determine your draw length. The first thing the archery salesman will do is determine your draw length. They’ll use the wingspan method or perhaps another to make this measurement.
Determine your draw weight. After that, they’ll have you shoot the bow in the range to figure out your draw weight. They’ll start light and have you work your way up. If you’re an absolute beginner, they’ll likely start you at 40 lbs.
Sight your bow. After you’ve bought your bow, the salesman will help you sight it to ensure accurate shots. I’ll be doing an entire piece on how to shoot a bow, including how to sight it, in a future article.
As you get more into bow hunting, you’ll discover lots more to explore with compound bows, but the above will suffice for the true beginner. We’ll be doing some more pieces on bow hunting as the season progresses. Stay tuned!


