
From pocket watches to grandfather clocks, men have long held a fascination with keeping time in stylish and classic ways. What better way to do so than turning a handsome hardcover book into a working clock? This project is similar to what Brett did a couple years back with turning a hardcover book into a secret safe. Instead of stashing this on a bookshelf and hoping it’s not seen, however, this project is meant to be proudly displayed in your home or workplace. Coming in at under $10 and a few hours of your time at the most, this makes for a great Saturday afternoon project and an inexpensive way to decorate your apartment or man room.
Plus, with Valentine’s Day around the corner, this would make for an inexpensive but highly romantic gift for your sweetheart. Pick a book that makes her swoon (say, Pride and Prejudice) and inscribe the inside cover with a time-related sweet-nothing, like this baby from Henry Van Dyke: “Time is too slow for those who wait, too swift for those who fear, too long for those who grieve, too short for those who rejoice, but for those who love, time is eternity.” Better have some smelling salts handy.
Supplies
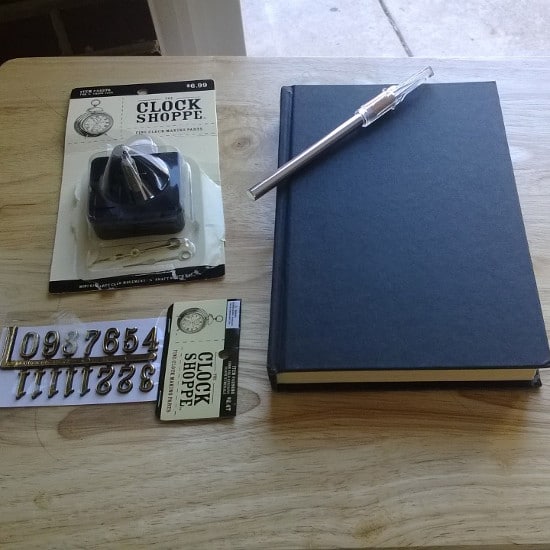
- Hardcover book. Hardcover is your best bet so that it can stand on its own. I used an old book that I never planned on reading, but another option is to find something with a unique design on the cover. Those are hard to come by these days (because they’re more money to produce), so you may need to look in antique stores. You could also use a favorite book of yours — I know it seems sacrilegious to some, but you can always buy another copy. And this way not only will you be reminded of your favorite work on a regular basis, it will serve as a great conversation piece that will allow you to share your love of it with those who visit.
- Utility knife or X-Acto knife
- Power drill
- Clock kit (can be found at most hobby/craft stores — this one was from Hobby Lobby for $7)
- Clock kit numbers ($2.50)
- Optional: super glue
1. Decide where to place the clock on the book, draw your template, and get cutting.

You can see I went with an off-center placement, just for some artsy-fartsyness. I placed the main clock hardware down on the page, drew a line around it, and started cutting with my X-Acto knife. I debated between this step or drilling first, and opted for this one. You can decide on your own after you’ve read through the process.
2. Every once in a while, check the hole you’re cutting out.
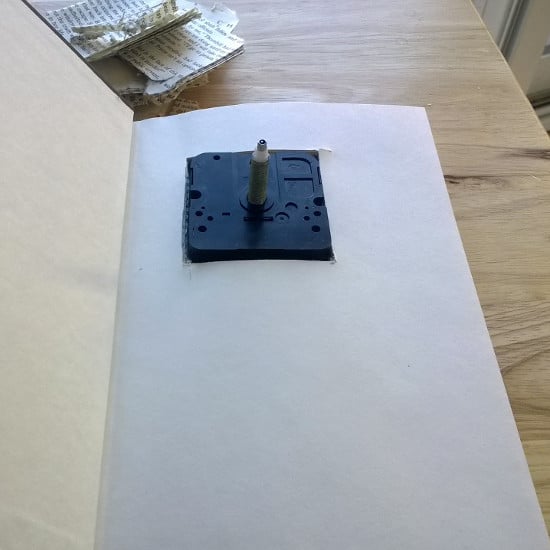
Your cutting is bound to not be perfect, so every 50 pages or so, place the clock mechanism in the cutout to make sure it still fits nice and snug. You don’t want the cutout to be too big, or the mechanism will move around too much — it has to be stable.
3. Cut through enough pages to almost cover the entire mechanism, including the clock shaft.
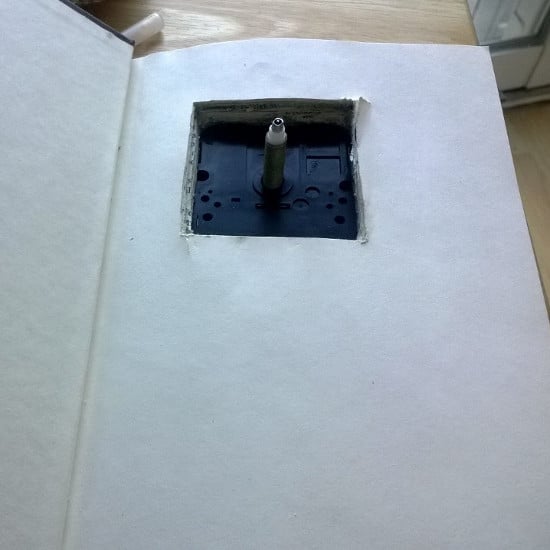
I used a fairly short book, so had to cut almost all the way to the back cover. You can see that when it’s placed in the cutout, the mechanism is almost entirely covered, with just a small portion of the clock shaft popping up.
4. Drill a hole in the cover.
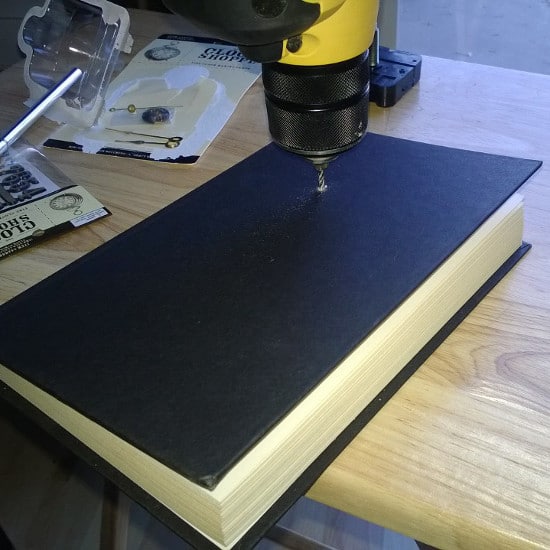
With the clock placed inside, I measured the distance from the top and left side to the center of the mechanism. Then I took the clock out, flipped the cover closed, measured, and drilled the hole. Keep in mind you’ll need a fairly large bit, but it’s better to err on the side of too small than too big. Again, it has to be snug so it doesn’t move around at all. If you don’t have a drill (which was me the first time I did this a few years ago), you can use your knife to puncture the cover and sort of just wriggle it around a bit. It’s a little crude, but it works in a pinch.
5. Place the clock mechanism through the hole in the cover.

When I did this step, I had the book opened up and I pushed the mechanism through from the backside, then lowered it into the cutout in the pages. I left just a quarter-inch or so of the main clock shaft showing. How much you leave is really up to you.
6. Clean up the edges created from pushing the clock through the cover.
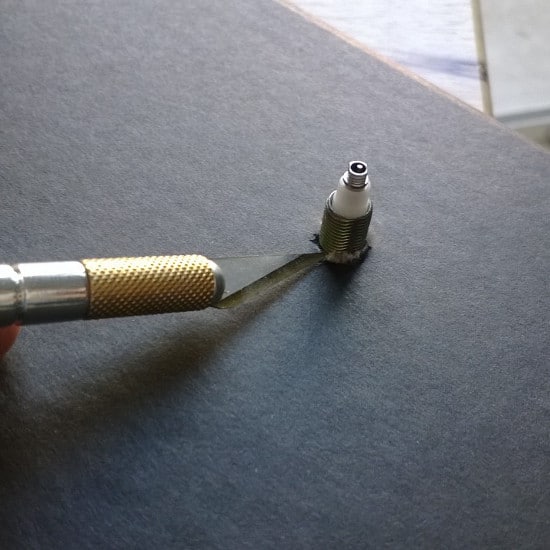
Between the drill and pushing the clock through, the cover is bound to be just a little disfigured. Clean it up with the knife so it’s flat and even — remember, this will be showing, so it has to look good.
7. Assemble the clock according to your kit’s instructions.
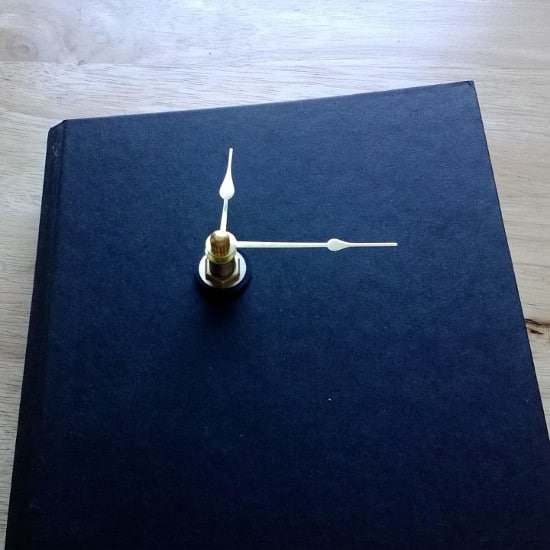
This is a fairly simple process. It’s a couple washers, the hands of the clock, a nut, and you’re set. I opted to not use the seconds hand.
8. Add numbers as desired.
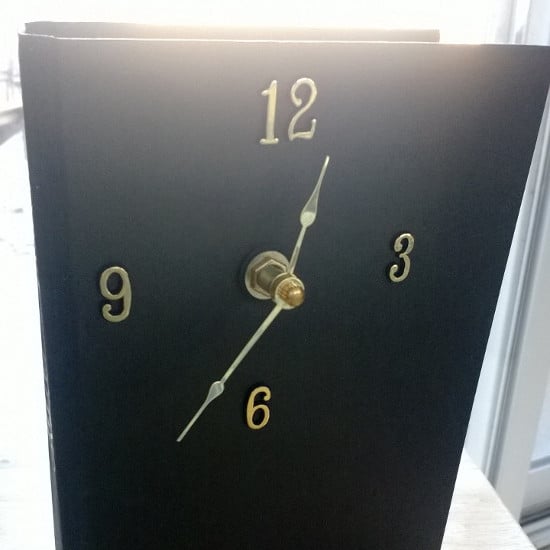
I went with the elegance of just four numbers. They are generally sticky, so you just place where desired and hold for a few seconds until they’re secure. Make sure the numbers are evenly spaced — a much easier task when doing only four. You can also opt for no numbers at all. On the first book clock I made, a couple numbers have fallen off, so super glue is optional here if you’re really going for longevity and durability. Mine went through a few moves, which certainly didn’t help matters.
9. Insert battery, set time, and enjoy for years to come!


