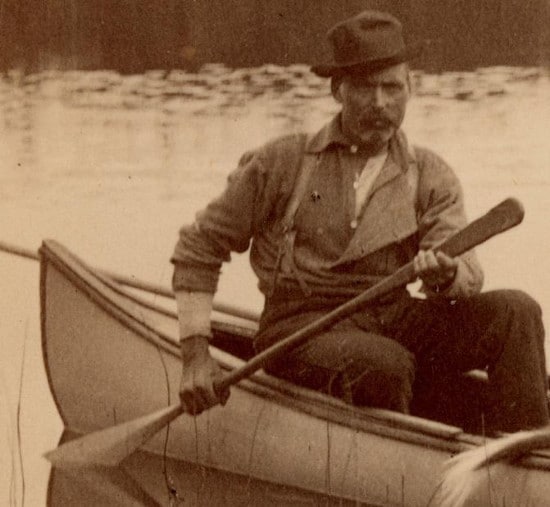
“I bet your other beaus never made you a canoe paddle, did they Fanny?”
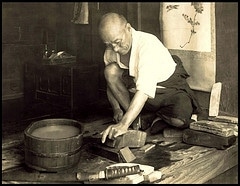
Making something with your hands is a rewarding experience no matter how you do it. When it comes to making a canoe (or kayak) paddle, it’s a very personal thing. As fly rods are to fishermen and shotguns are to pheasant hunters, so are paddles to a canoeist. It is the primary tool that you use to touch the water, and in my opinion can be as important or more important than the canoe.

The modern woodworker has many tools at his disposal, as well as amazing new wood glues that make for strong and beautiful laminated blades. Power planes, routers, band saws, and drum sanders can make paddle building a pleasant way to play around with wood, make presents for your friends, and get you out into your workshop instead of in front of a 47″ 1080i Blu-Ray Hypnosis Machine.
The problem is that the aforementioned tools can run you a few thousand bucks and take up half the garage, which is fine if that’s your thing. But what if you want to make something out of wood and don’t have the entire Delta catalog at your disposal? How about some hand tools?

Making a paddle out of a single piece of wood isn’t easy, but it’s doable. The trick is to remove everything on a 2″x 6″x 6′ piece of clear red cedar (or sitka or cherry or whatever) that isn’t a paddle. Easier said than done, but you do not need power tools to do it.
Note: This is how I do it. No doubt at least a dozen people reading this do it differently. Or better. Or way better. That’s great! No need to waste time reading this article then. Go make yourself a paddle instead!

1) Get a piece of good wood. I can guarantee you that Home Depot or its regional equivalent doesn’t have a piece of wood that’ll service your needs. You might get lucky, but you might have to pick through fifty boards or more to find a compromise, and if you want hardwood, forget it. Find a local shop that sells hardwoods, or find a local shop that does millwork. They know good wood, and they’ll let you dig through the stack until you find the board that says “I’m the one.” They don’t get annoyed; in fact, they’re usually interested in your project if you bring it up.

2) Purchase or borrow some good tools. If you take a poll amongst your friends, you’ll find that there are a lot of unused hand tools lying around. They may need some sharpening, but if you bring them back in better condition than you received them, you can borrow them whenever you want.
The tools I used for this project were as follows:

I use two different types of drawknives. For heavier wood removal I use a French-style drawknife. I like the control the handles provide me, and it can hog off a lot of wood quickly but still can be used with a deft touch to finish off a surface. It is sharpened on one side only, much like a plane blade.

My second drawknife is called a Bowyer’s drawknife. It’s a smaller, less common tool I normally use for building long bows. It is useful for more delicate work, and has the advantage of being a cabinet scraper if inverted and the edge used at 90 degrees to the surface you’re working.

Small block plane. I rescued this one from a garage sale for three bucks. It needed a good steel wool session to remove surface rust, and I flatted the bottom on a piece of sandpaper glued to a large piece of glass. The blade needed some love too, but after a few hours work I had a plane that I’ll put up against anything new. It adjusts with the tap of a hammer (sorta cool), and my newer plane sits in the toolbox now.

Crooked Knife. This is a fairly common tool among indigenous people of the northern US and Canada. This one was built for me by Aaron York, an Abenaki Algonquin who makes gorgeous birchbark canoes (as well as knives for his friends). It also has a plane-like blade, sharpened only on the top; the botttom is flat and doesn’t dig into the wood you’re working. It’s a little weird getting used to it, but it does some stuff other tools find more difficult.

Patternmaker Rasps. These are constantly in use whether I’m making paddles or longbows or anything that needs complex shaping. The Nicholson rasps were the gold standard, a #49 and a #50. Sadly, Nicholson rasps are now made overseas and I hear the quality has slipped. If you can find older rasps at flea markets, grab ’em and send them to me…they’re worthless. Actually, they’re quite valuable, and can be re-sharpened and brought back to life.
Because of the detail I put into my grips, I use Japanese-made rasps that work as well as or better, have a nice point for fine work (and cost less than Nicholsons). Find a luthier supply company and they’ll have them. The #49 is rougher, the #50 smoother. If you can only afford one for paddle-making, get a #49. If you can find a #41, send it to me. Again, they’re worthless. I’ll pay postage.

Angle gauge. Useful for making sure your surfaces are flat or at the angle you want, whether for squaring off the shaft or tapering the blade. You can square it up on your bench or anything with a 90 degree angle. Perfect accuracy doesn’t matter, remember? You’re hand-building. Leave perfection to the guy with the laser-guided Delta Unisaw.
Cabinet Scraper. Cleans things up wonderfully. Awesome tool that deserves its own article.

The best tool of all: my Schnitzelbank. German for “shaving bench,” it’s also a drinking song. Ist Das nicht ein Schnitzenbank? Seriously…
Anyway, there are plans all over the internet and they’re great tools. Coopers (barrelmakers) used a similar bench, as it’s better than a vise: you can unclamp your work in a millisecond, turn it and clamp it down again, and keep working. Saves oodles of time. It’s an elegant if simple machine.
Okay — to work…

3) Trace the top view shape of the paddle on the board. You can trace one you already like or just use a French curve and go at it. If it’s an aesthetic shape, it’ll probably work great: as Sully said, “form ever follows function.”

In this case I picked a blade I liked and a handle I shaped on a different paddle, so it’s a bit of a hybrid. It’s your paddle, do what you want to do. If you’re not sure, make the first cut too big and slim it down later. Easier to take off than put back. I will keep saying that.
Be sure to create a centerline down the paddle from the top of the grip to the tip of the blade. This will be an important reference for you later, and you can use it to make sure your tracing is symmetrical. Note: the centerline of the paddle may not be the centerline of the board. You may choose to offset the blade or the grip to take advantage of a nice grain or to avoid a knot. Take your time. Make it perfect before you remove a splinter of wood.
Some folks like to trace the shape on both sides of the blank. I prefer not to. If you get it wrong, you get a parallelogram paddle. With one reference, you’ll always be sure of the right line. With two…not so much.

4) Start hogging out all the wood that isn’t paddle. There will be a considerable amount of wood that won’t be paddle. This is your first use of the drawknife. Go crazy, but with some control.
Consider the grain of your wood as you start taking off wood. You want to take off wood on your own terms. You don’t want to pick up a line of grain and have it follow down past your reference lines. If you see that start to happen, stop immediately, turn the blank around, and cut the other way.

If you can get help from the kids next door, so much the better.
When you get close to your reference line, no closer than a quarter inch, chill out. Now is not the time to go nuts. Take it slow and leave a little for the plane to clean up later.

Make sure that as you get to your line your edges are square. If you are working the shaft, sometimes a block plane is easier to get things flat and square. As you can see, I’m a little high on the left here. The layout line is on the right, so I’m okay.
When you’re done you should have a piece of wood that looks like a paddle from the top and a piece of 2×6 from the side.
5) Layout the profile on the side of the blank: shaft, blade, and grip. Now that you have a blank that resembles a paddle from one side, let’s work on the blade and shaft thickness.

We’ll start by establishing a centerline down the side of your blank. You can do this a number of ways, with a straightedge or chalk like or whatever you’d like. This must be dead on straight, no exceptions. If this is crooked, so is the paddle. Unlike the top profile, I lay out both sides of the blank. The precision required here is more critical than the top rough shape.
Once I establish my centerlines, I divide the paddle into three sections: the blade, the shaft, and the grip. Here I want a line that’s 90 degrees off the centerline where the blade transitions to the shaft, where the shaft transitions to the grip, etc. This allows for an accurate layout.
Start with the shaft. The shaft thickness and shape is a personal preference, and whether or not you want an oval shaft or a round one. If you want an oval shaft, you need to make the side layout lines farther apart than the top layout lines. Divide the thickness of the shaft in half and measure up the perpendicular layout lines, making a mark. Do that on both layout lines and you’ve got your shaft layout.

Next we’ll mark off the blade. You want to taper from the thickness of the shaft down to the thickness of the tip of the blade. For your first paddle, I’d make the tip no less than a quarter inch thick, especially with softer woods like cedar and spruce. For cherry or other harder woods, you can go thinner, but for now, let’s stick with a quarter inch. Same technique as before. In this case measure 1/8th of an inch from centerline and mark it. Then you simply connect the dots.

It’s tough to trace a grip right from a paddle profile. Best is to make a template out of cardboard (the non-corregated kind). Make only a half pattern, and use the centerline to reflect the pattern. It’s much easier than trying to make a symmetrical pattern.
6) Start removing wood from the blade. If you lost your top centerline, re-establish it. You want the blade and the shaft to be square until the very end of the process, so don’t be tempted to start shaping by rounding over the edges. Just get the basic outlines hogged out using the drawknife, getting close to the line but not over it. Leave at least a quarter of an inch at the tip and 3/8ths at the sides of the blade.

This is a laborious task and should be done slowly and methodically, especially as the blade becomes thinner and you have the ability to make a big mistake quickly. A block plane is great at the start, but as you get closer, give it up for a rasp if you are at all nervous about your planing skills. Easier to take it off than put it back.
Start removing the wood between the centerline and the layout line on the edge of the paddle blade. You don’t want to gouge out any wood below the imaginary plane created by the centerline and the edge of the blade.
Your blade should be close to done, but still pretty angular. We’ll clean it up in a minute. Now you should have a paddle blade of which Fred Flintstone would be proud.
7) Remove the wood that isn’t top grip. This is also a delicate procedure. Take it slow and easy, and leave the layout lines. This is where a rasp works best for novices, as it allows a lot of precision without a lot of risk; it just takes a lot longer to shape the grip if you’re doing something weird (like the paddle I’m making).

A lot of the grip is based on personal preferences. Rough it out and leave it for a while; you’ll probably finish that last, even after varnishing or oiling your “finished” paddle.

8) Remove the rest of the wood that isn’t shaft. This is pretty straightforward…your layout line is long and straight. Make your shaft as square as possible, and don’t be afraid to drag out the angle gauge to make sure it’s still square. If your layout line is a tad off, you’re still fine; you have to round it off still and that can cover a multitude of peccadilloes.

9) Start knocking off the corners. At this point you have a very angular, rough paddle, but it’s pretty nearly done. Now you can start to shape the edges of the blade, soften the angles a little, make a nice transition from the shaft to the blade, and from the shaft to the grip. Take a plane to your shaft and create an octagon from the rectangle. If you’re really good, take the corners off the corners with a plane, or start rasping. Turn the shaft and blade often to make sure you’re not overworking one side of the paddle. Eye it frequently and look for imbalances, and correct them.
This is where the lines and measurements start to matter less and less. You’ve got a pretty symmetrical paddle at this point. You need to trust your eye and check your work often.

At this point I’m done with planes and I’m using light rasps and scrapers only. If I see a high point on the blade, I’ll scribble on it with a pencil to indicate the high spot, then scrape off the pencil lines, and check it again. It’s a technique I learned from making longbows. Twenty five scrapes of a cabinet scraper can make the difference between a well-balanced bow and a stick. It’s not that critical for a paddle, but hey, better too precise than not at all. If you trust your eye, don’t worry about it.

You can see that on this paddle that it’s high on the left side, and I needed to take it off. The black pencil marks are where I took the wood off.
10) Start finish sanding. You should have a pretty good feeling by now…you’ve created a pretty nice piece of art that doubles as a useful tool. Start with a pretty gritty sandpaper (80 on hardwoods, 120 on softer woods) and sand until the rasp marks are gone. Switch to finer grits until you get to 180-200 or so.
A flexible sanding block is nice to work the blade: it gives you some control over the surface of the paper without being too rigid. For the shaft, the old shoeshine method works great: cut a 1×8″ piece of sandpaper and buff the shaft like it’s the front of a nice pair of dress shoes. Cabinet scrapers work well too, so if you’re making a hardwood paddle, go for it.
11) Prepare for finishing. Take your lovely paddle and get it wet to raise the grain. Don’t soak it. Do not soak it. A spray bottle of water is plenty to do the job. After it dries, sand it again with some 220 grit to knock down the grain. Now for the fun.

12) Choose a finish. This is a religious discussion. Spar varnish? Swedish oil finishes? Beeswax and linseed oil? Hempseed oil? My preference is a combination.
I like varnishing blades. Obviously that’s the part that’s in the water the most, and I like them sealed up good to prevent warping. I start with a half cup of spar varnish thinned with a few teaspoons of paint thinner. This lowers the viscosity and lets it soak deep into the grain. Soak the blade thoroughly and hang it to dry overnight. Hit it with a fine sandpaper the next day and use straight varnish to protect the paddle blade. Put on as many coats as you want to. Three or four is usually plenty (not including the priming coat).

You can do the same to the shaft if you prefer that. Heck, you can do that to the whole paddle if you want to. I prefer oiled shafts and grips, they feel a little better on my hand. Varnish can get sticky when it gets wet, and with an oiled grip and shaft I’ve never had a single blister.
Whatever oil finish you use, the trick is to really penetrate the wood. I like a mix of linseed oil and beeswax. Don’t use raw linseed unless you want to pass along a wet paddle to your estate in your last will and testament. I often use a blow dryer to really drive the oil into the wood for the first few coats. Once the wood is wet with oil, I like to wet-sand the surface with 320 wet-dry and create a slurry of wood dust and oil and drive it into the pores of the wood. Wet sand it, let it sit 20 minutes or so and rub it down with a lint-free cloth.
Repeat as many times as you can stand. I oil my standard use paddles three or four times a season, more if I feel like it. The lesser used ones get a coat early season and before I put them to bed for the winter.

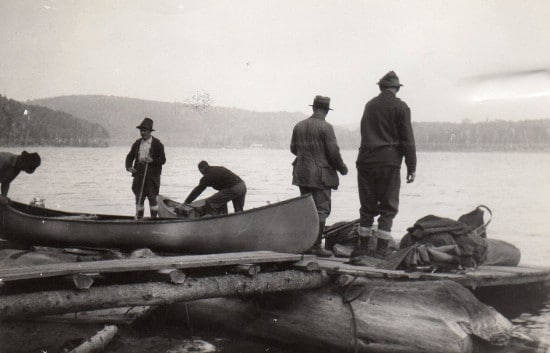
13) Test it. You gotta get it wet. Take out your favorite canoe (or borrow one from a friend). Your paddle should slip into the water quietly and you should feel the paddle flex slightly when you load up the blade. A flexible paddle is easier on your body than a stiff, rigid one, and that load you put on the blade you get back at the end of the stroke.
Clearly a traditional paddle isn’t for everyone, but it is a fun way to improve your woodworking skills. Even if you’re not a paddler, you probably have a friend who is.
I have a dear old friend and mentor who guided in the Boundary Waters for a few years back in the old days. At his stage in life there’s nothing I can give him…except a piece of my heart, hands and soul. This guy is tougher than a boiled owl gizzard, but I tell you: the only time I’ve seen him get misty is when I gave him a handmade paddle, the best gift a man can give to another man.