Editor’s note: This is a guest post from Creek Stewart of Willow Haven Outdoor.
As a Survival and Preparedness instructor, I take my line of work very seriously–sometimes too seriously. Occasionally, though, I like to take on survival projects that are just downright fun. This article highlights one of those projects.
I’m fortunate in that I’ve been able to turn my passion into my profession–this being the study of Survival and Preparedness. I’ve always enjoyed building survival kits of all shapes and sizes. I enjoy the challenge of fitting lifesaving survival necessities into small compact containers. I’ve built survival kits using film canisters, candy tins, key-rings, boxes, bottles, tubes, bags and everything in-between. For this project, I decided to build a survival kit using a shotgun platform–creating the Ultimate Survival Shotgun. My challenge was that everything had to be included in or on the gun itself–no extra pack items or containers. Below is what I did as well as the survival logic behind each decision.
Ultimately your survival needs fall into five main categories. Your situation dictates the order. They are:
- Water
- Fire
- Shelter
- Signaling
- Food
Every survival kit must include contents that directly or indirectly meet these five basic survival needs. The shotgun platform I decided to use is the Mossberg 500 – PUMP. I chose a pump action because it is easier for me to troubleshoot and work on in the field compared to other models. I chose the Mossberg brand because it is a very popular gun, and there are literally hundreds of aftermarket modification pieces and parts designed to fit this gun. I knew I would want to add on some of these extras to increase the gun’s survival value. Below is a photo of the shotgun “off the shelf”–before my survival modifications.

Mossberg 500 Pump Action Shotgun Before Survival/Zombie Modifications
I will now break down each survival modification and detail why it was included in the final build.
Ammunition
First things first: the gun itself. A shotgun’s primary purpose is hunting. Clearly, you can use this shotgun as a hunting weapon to “restock” on valuable calories. Humans can go for three weeks without food, but it’s not fun. Lack of food leads to light-headedness, weakness, and poor decisions. In a survival situation, meat is the fastest and most effective way to replenish lost calories. Meat comes in all shapes and sizes. Carrying different shot shells designed for different applications increases your chances of a successful hunt. For this reason, I chose to pack a variety of shotgun shells:
- Bird Shot: Designed for birds and other small game such as rabbit and squirrel.
- 00 Buck: Good for turkey and larger game such as deer.
- Slug: Designed for large game such as deer, hog, or elk.

Your Arsenal: Bird Shot, Buck Shot, and Slugs
In addition to hunting, a shotgun is an excellent self-defense weapon. It’s easy to imagine the need for a self-defense weapon in an urban or wilderness survival scenario–defending you or your family from man or animal. Not only is a pump action shotgun a proven deterrent, but it also has some serious knockdown power. Because of these 2 considerations (hunting & self defense), I wanted to carry as much ammo on the gun as I could. I filled the magazine and the chamber which holds 7 + 1. I also added a side saddle shell holder and a screw on stock mount shell holder which together extends my total capacity to 19 rounds of ammunition. Not bad at all.

Side Saddle for Holding Shells

Side Saddle on the Stock
Signal Flares

Special shotgun shells allow you to fire signal flares.
You are probably wondering what the short orange rounds are on the stock side saddle. These are specialty signaling flare rounds designed for 12 gauge shotguns. These flares fire over 300 feet and can be seen for miles. They are the perfect signaling solution for a shotgun survival kit. Not only are these EXCELLENT rescue signals but they can also be fired into a prepared fire pit to start a fire. In survival, multi-use products are key.
Knife

5” Ka-Bar Knife Mounted on a Picatinny Rail
I know from experience that one of the most important survival resources is a good quality knife. It can assist in almost every survival related task. I found a great 5” Ka-Bar brand knife designed to mount directly to a picatinny rail. The stock Mossberg shotgun does not have picatinny mounts, so I purchased a barrel mount picatinny rail unit. This makes the knife easily accessible for quick deployment. A knife can perform thousands of survival tasks including dressing game, cutting wood and cordage, striking a fire steel, digging, scraping, prying, slicing, and the list goes on and on. I prefer a larger survival knife, but this one will work just fine. I sacrificed size for the seamless integrated mount option.
Flashlight

Another tool that assists in survival is a light source. Without a flashlight, low-light work or travel can be very difficult & dangerous–sometimes impossible. Not only can a flashlight allow you to be productive in low-light conditions, but it can also be used as a nighttime signaling device. A good flashlight can also help prevent injuries in dark conditions. I purchased a flashlight with a picatinny rail holder for the other side of my barrel. The push button switch on this flashlight is also a compass. Now, I have a means to confirm direction as well. This can certainly be useful in any survival scenario.

Flashlight/Compass combo will ensure you never get lost.
Storage
At this point I need to be thinking about storage space to house several other crucial survival items. After much consideration, I opted for 2 additional modifications which gave me 3 separate storage areas. I first replaced the standard stock with an integrated pistol grip/stock combo unit. The rubber butt plate unscrews and detaches, revealing a generously sized compartment inside of the stock.

In addition, the pistol grip is hollow which allows for more storage.

I went one step further and replaced the pump hand grip with a picatinny version mounted on a picatinny compatible vertical grip.

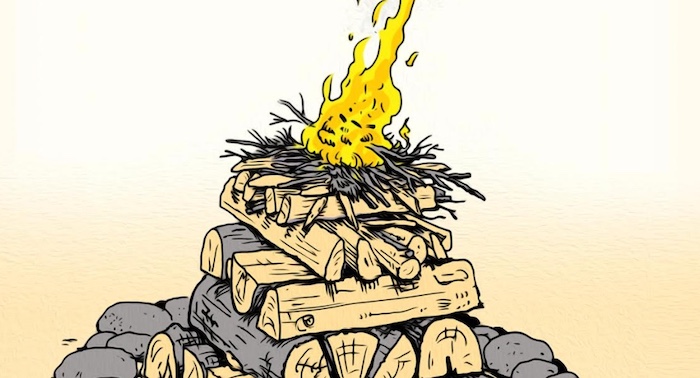
Fire

Fire kit that’s stored in the vertical grip.
This particular grip is already designed to store extra batteries and has a water tight seal. This makes an excellent area to store fire starting materials. In here, I stored 6 waterproof matches and a striker. I also stuffed in some steel wool and a package of WetFire brand fire starting material. Both of these are excellent fire starting aids even in damp conditions.

Quick Access Fire and Steel Setup
Before I started assembling items to be stored inside of the stock, I carved a groove along the top of the stock to fit a blank fire steel rod. I used epoxy to permanently secure this in place. I like the idea of having quick access to the fire steel without taking the time to open a storage area. Using the back side of the Ka-Bar, I can strike a shower of sparks into one of my fire starting materials to quickly ignite a fire.
Multi-Tool

Store your multi-tool in the hollow pistol grip.
In the hollow pistol grip I stored a small Gerber Multi-Tool with pliers, large flathead screwdriver, small flat head screwdriver, cross point screwdriver, small knife, nail file, and tweezers. All of these tools can be useful in a survival situation. I carved a custom rubber plug for the bottom of the pistol grip from a cheap rubber door stop and spray painted it black. It is a perfect and secure fit.
Survival Kit

A survival kit that fits in the butt stock of your shotgun.
Next I assembled a variety of survival kit items to be stored in the butt stock compartment. To remove the rubber butt plate, I use the cross point driver on the multi-tool. Below are the items that I included in this kit and why.
- 4”x6” Aluminum Baking Pan: Available at any grocery store, this aluminum bread pan can be folded flat for compact storage. A metal container is invaluable in any survival scenario. It can be used to boil water which kills bacteria, virus, and cysts. Boiling water is a 100% effective method of water purification. This container can also be used for other cooking tasks as well as water collection. The reflective metal also makes an excellent signaling device.
- Trash Bag: A trash bag has a myriad of survival uses. Some of the most practical are poncho, water collection, ground tarp, make-shift shelter, solar still, and flotation device.
- Fishing Kit: This kit includes 20 feet of 30 lb test line, 5 assorted fish hooks and 3 sinkers. Not only can these items be used for fishing but the line can also be used as cordage for shelter building, gear repairs, or animal snares. Bank lines can be set at night to work while you rest.
- 2 Non-Lubricated Condoms: By design, condoms are watertight. They make amazing water containers–capable of holding about 1 liter of water each. They are very lightweight and compact and make great back-up water collection and storage containers. They can also be used to protect fire materials such as matches and dry tinder. You can also fill these with clear (but not purified) water and leave them in the sun for 48 hours for UV purification.
- Water Purification Tablets: Boiling water is not always possible or practical. Chemical water treatment tablets are an excellent back-up water purification solution. They weigh virtually nothing and take up very little space. You can fill up a condom with water and use a tablet to purify it. They also have a very long shelf life. Chemical tablets are not very effective on cloudy or dirty water. The water must be fairly clear. You can pre-filter using clothing or a bandana.
- Emergency Survival Blanket: These survival blankets are designed to reflect and trap your body heat in a cold weather survival scenario. They also make excellent make-shift shelters, ground tarps, ponchos, rescue signals, and fire heat reflectors.
- First Aid Supplies: (packed in zip lock bag): 3 adhesive bandages, 30 SPF sun block packet, 2 wound closure strips, 2 Ibuprofen pills, 2 Acetaminophen pills, 2 Calcium Carbonate pills.
- Carmex Lip Balm: Not only for obvious reasons, but this petroleum based product can be mixed with natural fire tinder such as cattail down. Doing so can extend burn-time up to 5 minutes which is very helpful in fire building. This is an excellent multi-use product.
- Whistle: Even though I have signal flares, a rescue whistle is always a good idea.
- Small Bic Lighter: This is the easiest way to start a fire.
- Snare Wire: Snares can work for you while you are working on other tasks–such as sleep. I’ve included 25 feet of snare wire for building traps. This can also be used as cordage or binding for a variety of projects.

Emergency blanket in survival kit can be used for shelter.
I carefully wrapped most of the items inside of the trash bag for water proofing and then stored everything in the stock storage area. All of the kit items only weigh a few ounces.

What the survival kit looks like in the butt stock.
Saw

Makeshift Survival Saw
One tool that I use extensively while on survival trips is a handheld folding saw. It’s not practical to include one of these in this shotgun kit. However, I did incorporate a suitable work-around. A saw is an excellent tool for cutting larger fire wood or collecting limbs & trees for shelter building. I purchased 2 replacement bow saw blades and cut them down to fit the span between the back of the pistol grip and the butt stock sling stud. I added another sling stud to the bottom back of the pistol grip which allowed for 2 anchor points. Using 2 small bolts which I keep in the stock, I can secure 1 of the saw blades on these sling studs–creating a perfect make-shift bow saw. I chose to pack 1 blade designed for wood and 1 blade designed for metal to give me versatility in a variety of survival scenarios. The blades easily tuck into the butt stock compartment when not in use.

Saw in action.
Cordage

Make your gun sling from braided paracord.
At this point I am still lacking sufficient cordage. Never underestimate how important cordage can be in a survival scenario. My favorite cordage is 550 Parachute Cord. I always like to keep as mush 550 paracord with me as possible. It can be used for all kinds of survival functions from climbing ropes to shelter construction. 550 paracord is comprised of 7 inner strands which can be used independently as well. These lines make excellent snares and fishing line. For this reason, I also added a shotgun sling made from approximately 80 feet of braided paracord. If necessary I can unravel the sling and use it accordingly.

Another view of the paracord gun sling
Bandana

I finished off the sling by tying on a bandana. I have used a bandana in more ways than I can count while camping and backpacking. It is an incredible multi-use product that I know for a fact would be very useful in a survival situation. Below are just 15 great bandana survival uses:
- Filter/Sieve for dirty water
- First Aid Bandage
- Dust/Sand Mask
- Hat
- Signal Flag
- Dew Rag for collecting dew as drinking water
- Container for collecting berries, fruit, nuts, etc…
- Cut/striped into emergency cordage
- Cleaning Rag
- Neck Gator – Cool Weather
- Evaporative cooling neck band – Hot Weather
- Filter for Bush Tea (filtering out seeds, leaves, bark, etc…)
- Eskimo sunglass to prevent sun blindness. Cut eye slits in the bandana.
- Trail Markers – strip into pieces
- Last ditch toilet paper
Locked and Loaded

So there you have it, the Ultimate Survival Shotgun ready for even the worst scenario. It offers multiple solutions for securing food. It offers multiple solutions for collecting and purifying water. It offers incredible signaling devices. It includes shelter building materials and also several “fool-proof” fire building methods. It also includes a knife, a flashlight, 80 feet of paracord, 2 saws, and a complete first aid kit. If the zombies still eat your brains when you’re carrying this thing, it’s your own dang fault.
Inspiration
However, it is still missing one very critical piece. Survival is 90% mental. Keeping your morale and spirits high is absolutely critical. Finding your inspiration and motivation for staying alive can get you through even the worst of situations. The will to live is more powerful than any skill or tool you can buy or improvise. I always include something personal in every survival kit I build–an item that might keep my spirits lifted and remind me of what I’m fighting for. It can be anything–a photo of your girlfriend or your family, a song lyric or a motivational quote. It must be meaningful and inspirational to you.
So finally, for inspiration, I had one of my favorite passages engraved on a small metal plate which I affixed to the receiver of this survival shotgun:

Now…I’m all set.
Many of the lessons in this project apply to building any kind of preparedness kit for urban or wilderness survival. Basic survival principles apply to almost all survival scenarios. I hope you’ve enjoyed this article and have taken something away that you can use in your own preparedness efforts and projects.
Remember, it’s not IF but WHEN.
Creek
Addendum: Many have asked about the weight of the gun and where you can get the modifications mentioned. Before the modifications, the gun weighed 7.5 pounds, after the modifications it weighs 9.5 lbs. For a list of where you can get the supplies, click here.
____________________________________
Creek Stewart is a Senior Instructor at the Willow Haven Outdoor School for Survival, Preparedness & Bushcraft. Creek’s passion is teaching, sharing, and preserving outdoor living and survival skills. Creek is also the author of the book Build the Perfect Bug Out Bag: Your 72-Hour Disaster Survival Kit. For more information, visit Willowhaven Outdoor.