“A paste of lye and water can burn through an aluminum pan. A solution of lye and water will dissolve a wooden spoon. Combined with water, lye heats to over two hundred degrees, and as it heats it burns into the back of my hand…on the lap of my bloodstained pants…”
-Passage from Fight Club, by Chuck Palahniuk
If you’ve ever seen the movie or read the book Fight Club, then you know what a potentially volatile endeavor the making of soap can be. If you are careless with the sodium hydroxide (lye), a poisonous, caustic substance, you risk burning holes in your flesh, blinding yourself, and endangering others. But if you’re conscientious in your work, DIY soap-making can be a great hobby. Most soaps out there are designed for the ladies and have foo-fooey scents; making your own allows you to come up with your own manly concoctions. Your signature bars of soap can also make great inexpensive gifts. And most importantly, it provides an opportunity for a man to create instead of consume and enjoy some tangible fruits of his labors.
Today we’ll discuss how to make your own manly bar of soap. This bar of soap has a nice light coffee scent along with deodorizing exfoliates to clean your hands when the grease is ground deep into them from working in the garage. For the exfoliates, we’ve chosen coffee grounds and ground walnuts. Here’s why:
Coffee Grounds: Interestingly enough, the inclusion of coffee grounds makes for a powerfully deodorizing soap. Coffee grounds are a perfect ingredient for removing disagreeable scents from your hands after, say, you’ve been cooking with a lot of garlic or fish, working on your car, or fixing the lawnmower.
Walnuts: The walnut is a relatively soft nut and acts as a nice counter exfoliate to the slightly sharper, harder grounds of the coffee. Not only that, but the walnut is a rather ugly nut. It is wrinkled and imperfect–and let’s face it, most of us have similar aesthetic qualities–so it seems a fitting ingredient to include in a man’s soap.
What You Need
Aside from going around collecting your ingredients and equipment, you will need about two hours to make a batch of soap. This includes the preparation, the heating and mixing, pouring the molds, and the clean up. However, this assumes the use of a hand blender. If you whisk the ingredients by hand at the tracing stage, add several more hours to that.
The ingredients you will commonly see in bar soaps include oils and/or fats, sodium hydroxide (lye), a liquid base (which can be water, coffee, beer (if you use beer, make sure it is flat), etc.…), exfoliates (optional), essential oils, herbs, and fragrances (all optional), and so on.

The equipment necessary for making your own soap includes:
- Three containers – (2) plastic buckets (one two-gallon, one five-gallon) and (1) large metal pot, more if you are making a large batch.
- Molds – Can be made from just about anything. We used a baking tin and 3-inch, capped Abs piping.
- Two thermometers
- One accurate scale
- Two wooden spoons
- Hand blender (It is possible to use a whisk, but you’ll be there for hours before your soap traces. Do yourself a favor and get a hand blender)
- Rubber gloves, goggles, face mask, long sleeve shirt and pants
- A big bottle of vinegar, which neutralizes lye. Don’t work with lye without it.

A quick note about cost: Unless you are buying your ingredients in bulk or are accustomed to paying top dollar for artisan soaps, this project is not necessarily a money saver. Most bars of artisan/handmade soap will go for between $5 and $9. These bars ended up setting us back about $2 each once everything was accounted for. That being said, if we were to take advantage of bulk purchases and considering that the equipment cost would be less and less, I can easily see the price coming down to around $.75 a bar.
Pre-Gaming
Preparation is crucial. Before getting down to the actual making of the soap, you need to consider and do several things. First, choose what types of oils/fats you want to use. Common choices include olive oil, coconut oil, palm oil, lard, soybean oil, and butter fat–they all have unique qualities when used for soap. If you aren’t interested in spending much money, just use what you already have at home–it may not be the best artisan soap, but it can work if you have enough.
Next, based on the type and quantity of your oils, calculate how much lye will be needed for the soap. Use the calculator at The Sage, which allows you to input the weight of your oils and gives you a readout for recommended lye quantities, as well as how much liquid base to use.
Last, prep your equipment and ingredients. Everything must be clean and completely dry. Again, lye mixed with water can erupt a volcano of unwanted chaos in your kitchen. Be careful with this stuff. Spray Pam (or some similar vegetable oil) into your molds so that your soap doesn’t stick. Chill your liquid base (for these bars we use coffee), and measure out all of your ingredients. When you are measuring out your lye, make sure you have your gloves and goggles on. Once completed, you’re ready to get started.


This specific soap batch uses (amounts can certainly be modified):
- 51 oz. of olive oil
- 31.5 oz. of coconut oil
- 28 oz. of chilled, brewed coffee (as the liquid base)
- 11.94 oz. of lye
- 3 tablespoons of ground coffee beans
- 1 cup of ground walnuts
The Process
Step 1: Heat the oils

Pour your oils and fats into a metal pot and begin heating them at a low temperature. Though this soap only uses two oils –51 oz. of olive oil and 32 oz. of coconut oil–many artisan soaps will have upwards of five different oils. The choice is yours.
Step 2: Mix liquid base and lye

Pour your liquid base (28 oz. of chilled coffee–many suggest to double-brew it for a richer, darker color) into the two-gallon plastic bucket. Slowly, carefully, add your lye to the liquid base (11.61 oz. of lye). Always add lye to the liquid, not the other way around! Stir the lye-liquid mixture slowly until it mixes completely. The temperature will skyrocket at this stage, so let it cool down until it is between 100 and 125 degrees Fahrenheit after it is mixed completely.
Step 3: Mix oils and liquid/lye solution
 At 110-120 degrees, remove your oils from heat (they should all be completely melted at this point) and pour them into the large plastic bucket. Let the oil cool to 100-110 degrees, and then slowly, carefully, add the lye/liquid mixture to the oils.
Step 4: Tracing and Exfoliates
 Stir all of the ingredients together and add your exfoliates.
- Use a hand blender to mix your ingredients. Make sure the bottom of the blender is at the bottom of the bucket before turning it on and during use. You do not want your ingredients to splatter. Blend at five-minute intervals until your mixture traces. You know it is traced once the soap resembles soft paste/thick custard. It should be able to hold the crease from a spoon or support a drop for a few seconds before filling back in.
Step 5: Pour soap into molds

 Your molds should be prepped and ready to go. We use a capped-3-inch Abs pipe for one mold and a 2-inch-deep baking tray for the other one. This way we were able to yield both circular and rectangular bars. Place the soap in a dry location and cover it with a towel.
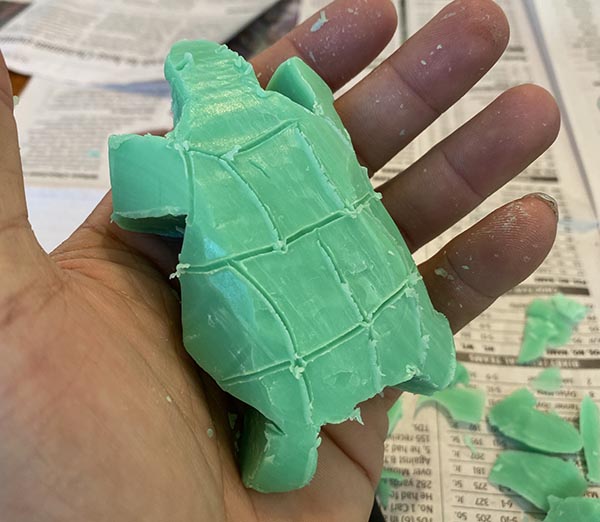
Step 6: Wait and cut
 After two days your soap should be solidified enough to remove from the molds and cut into bars. You can do this with a thin, sharp knife. You don’t need to buy anything fancy for this unless it is important to you that your bars are shaped perfectly.
Step 7: Saponification
 Place your bars of soap on a tray; cover them gently with a large towel. Let them sit for about four weeks so that all of the chemical reactions can occur. Lye mixed with oils creates a process called “saponification,” and once this process is complete, the ingredients in your soap no longer include “lye” itself, but “saponified oils.” Now your soap is set and you’re ready to scrub!
Step 8: Clean Up
The clean up is easy. Use cotton shop towels for the initial clean up to get rid of all the remaining raw soap and any lye/liquid mixtures. Let your equipment and shop towels sit overnight. The lye will mix with the oils and become soap (though still slightly caustic, the lye shouldn’t burn you but it can irritate your skin and eyes), and you can simply wash it all in a sink with A LOT of hot water and soap. Throw the shop towels in the washer after they’ve set overnight.
Final Thoughts
Keep in mind that there are literally dozens of ways to make soap. Different conditions, tools, and an individual’s skill as well as preferences may require a variation on the information and process provided here. That being said, has anyone else made some of their own soap? What suggestions do you have?