
Ever since I’ve owned a car, I’ve always taken it to a quick lube to get the oil changed. Every 3,000 miles I would find myself sitting in a lounge munching on complimentary donuts while some other man changed my oil.
But it never felt right.
I would stare out the window into the garage and watch the mechanics work deftly on my car. I would think, “That looks easy. Why am I paying another man $25 for a job that I could do myself?”
In addition to the resentment I felt for paying another man to change my oil, I was also jealous. I admired the knowledge and skills those men who worked on my car had, and I wanted to be able to do it too.
Of course, I never did anything about it, mainly out of laziness.
Well, after 10 years of taking my car to a quick lube to change my oil, I finally got around to learning how to change the oil in my car last month. And boy did it feel good.
Below, I provide a short guide on how to change the oil in your car. Let’s get started.
The Benefits of Changing Your Oil Yourself
Save money. Getting your oil changed at Jiffy Lube or similar shops usually runs between $25 and $30. Half the cost goes to labor. They have deals every now and then, but they’re few and far between. Changing your oil yourself will only set you back about $15 for a new filter and some new oil. In this tough economy, every little bit helps. The manly man is self-reliant and frugal.
You won’t get stuff stolen from your car. After one visit to the quick lube, my cell phone was missing. Of course, when I called the workers on it, they played dumb. I also had a few CD’s taken from another oil change place. (If you’re reading this Fast Lube guy, I want my Weezer Blue Album back.)
You’ll feel manly. Nothing will boost your manly confidence like learning a manual skill and doing a job yourself. The satisfaction you get after changing your oil is way more fulfilling than the satisfaction you’ll get getting a perfect score on Guitar Hero. You’ll get your hands greasy, and you’ll have the manly smell of sweat and oil emanate from you.
How Often Should You Change Your Motor Oil?
The common number that car dealers and mechanics put out there for oil changes is to do it every 3,000 miles or every three months. Because it has been repeated so often, many people have come to believe that it’s an unalterable law of the universe.
The 3,000 mile rule is actually good advice… if you own a quick lube and want to make loads of money. Modern engines and motor oils can actually last much longer than 3,000 miles in between oil changes. Most cars can go 5,000 miles in between oil changes. I’ve also seen some cars that can go for 12,000 miles before they need a change. There really isn’t hard and fast number. Bottom line, it’s longer than 3,000 miles.
Dealers and mechanics propagate the 3,000 mile rule because it means drivers come in more often to get their oil changed, which means more money for car dealers and garages.
So forget the 3,000 mile rule. Check your owner’s manual to find out how many miles your car can go in between oil changes.
How to Change Your Motor Oil
Gather your tools and materials. You don’t need much to change your oil. Below we list the essentials:
- New oil filter. Different cars require different sized oil filters. Check your car’s owner’s manual to find out what size you need. You can also check the auto parts book that all auto stores carry to find out which oil filter you car takes. You just need to know your car’s year, model, and make.
- Oil. You need enough oil to refill your engine after you drain it. Most cars require 4 or 5 quarts of oil. Also, make sure you get the correct oil grade for your car. Check your owner’s manual for the grade and number of quarts you need.
- Oil filter wrench. Sometimes you can get the filter off just by unscrewing it by hand. If it’s too tight, bust out an oil filter wrench. It’s an attachment that you put on the end of a socket wrench. Make sure you get the right size filter wrench attachment for the size of your oil filter. The attachment will set you back about $3.
- Socket wrench set. You’ll need a socket wrench to unscrew the drain plug and maybe to unscrew the oil filter.
- Something to catch the old oil. Anything will work. You can get a fancy oil drip pan or you can use an old refrigerator drawer or an old bucket.
- A funnel.
- Some old rags. In case you drop the oil plug into the oil pan and you need to wipe it off. They’re also good for wiping off your hands.
- Car ramp. While not a necessary item, it can make your job easier. You can buy plastic ramps that will elevate your car’s front off the ground. This will give you more room to work underneath your car. You can find car ramps at most auto stores for about $30.
Warm up your car. To ensure that you drain all the old oil out of your engine block, warm it up by taking your car for a spin. You don’t want the oil to be too hot, just warm enough so it thins out a bit. To tell if your car is warmed up enough, just turn on your heater. When your feet get nice and toasty, you’re ready to drain the oil.
Park the car on a flat surface. Park your car on a flat surface and engage the parking break. If you have those ramps, place them in front of your front wheels and drive up them. It’s always good to have someone out front guiding you so you don’t end up driving off the other end of the ramps. For added safety, put blocks behind both rear tires.
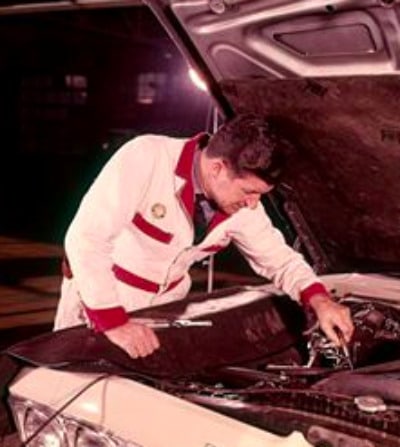
Pop the hood and remove the oil filler cap. Removing the oil filler cap can help the oil drain faster. It allows air to flow into the engine as the oil drains out.
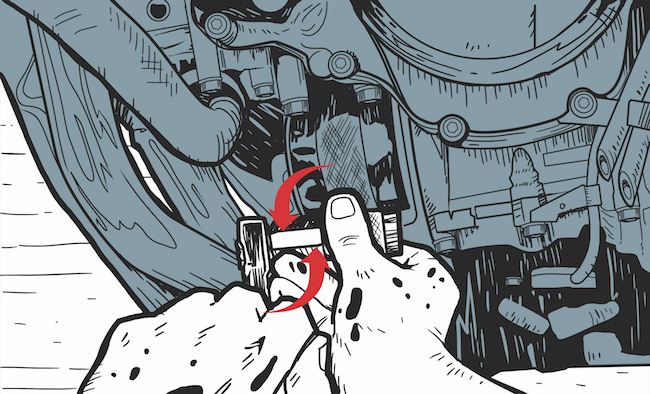
Remove the oil plug. Locate the oil plug underneath your car. It’s pretty easy to find. It’s a fairly large bolt on the oil pan’s bottom. Take an appropriate sized socket or wrench and start unscrewing the nut.
If the nut is too tight, try this little trick: get a piece of pipe that’s a bit longer than your socket wrench and place it over your socket wrench’s handle. This will give you some added leverage.
Don’t remove the oil plug completely with your wrench or you risk getting oil all over the place. Loosen it enough so that you can start unscrewing it with your fingers. Before you remove the plug, place your drip pan underneath the hole. When everything looks lined up, remove the plug. Make sure to hold onto the oil plug tightly or else you’ll have to fish for it in your drip pan.
Let the oil drain. After you remove the oil plug, let the oil drain out completely. It takes about 2 minutes for most engines to drain.
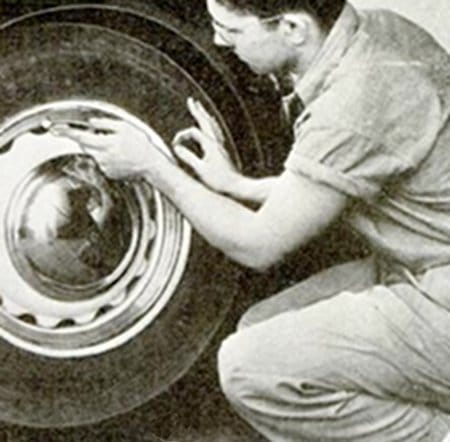
Here’s what an oil filter looks like
Remove the oil filter. Probably the hardest part in removing an oil filter is finding it on your engine. The first time I changed the oil, I spent a couple of minutes underneath my car scratching my head looking for the damn thing. The problem is there isn’t a standard position for where oil filters go, so it could be on your engine’s side, back, bottom, or top. Just look at your new oil filter and start looking underneath your car for something that looks similar. That’s your oil filter.
Now if the car manufacturer decides to put your filter in a weird place, it can be hard to remove. You might have to contort your arm in weird ways to unscrew it, but be assured you can remove it.
Oftentimes you can simply unscrew the filter by hand. However, if it’s too tight, bust out your filter wrench. Give it a few turns until it loosens up. Once it does, remove the filter wrench and finish unscrewing the filter by hand.
Before you remove the filter, make sure to have your drip pan underneath it. When you remove the filter a good stream of oil will come out.
When you remove the oil filter, make sure the rubber gasket ring comes off with it. If it stays on the car, the new filter won’t get an adequate seal on the engine.
Install the new oil filter. Dip your finger in some new oil and smear it on the gasket ring of your new filter. This will help the filter seat better against the engine. Thread the new filter onto the hole where the oil filter goes. It doesn’t take much to tighten your oil filter. Tighten it with your fingers until it stops turning. Then give it one more strong half turn. That should do the trick. Some oil filters come with instructions on how many turns you need to give a filter to tighten it. When in doubt, follow the instructions.
Replace the oil plug. Some mechanics suggest replacing the sealing washer on your oil plug before you start tightening it. If it’s a metal one in good condition, you can get away without replacing it. Put the washer in place and thread the drain plug back into its hole. Start tightening. When it’s nice and tight get out from under your car and remove the drip pan.
Refill the engine with oil. Place your funnel in the oil filler hole on the top of your engine and start filling your car up with new oil. Again, depending on the car, 4 to 5 quarts should do the trick. Once the oil is all in, screw on the oil cap and close the hood.
Let the car run. When you’re all done, start the car and let it run for about 5 minutes. This does two things. First, it allows your engine to regain proper oil pressure. Second, it gives you a chance to see if you have any leaks near your oil plug and oil filter. If you see any leaks, stop the car and tighten the plug and filter as needed.
Dispose of your old oil. Unless you want to go to prison or pay a hefty fine, don’t dump your motor oil in a sewer or the trash. Instead, take it to a proper disposal location. Most states have laws that require quick lubes and gas stations to accept used motor oil from consumers for free or at a nominal cost. Just place your used oil in the drip pan in a couple of old milk jugs. You’ll need to use your funnel and a helping hand to make the transfer. Screw on the lids, put the jugs in the back of your car, and drop them off at your local quick lube. You can also give them your old oil filter.
You’re done! Grab a Miller High Life or a hand crafted soda and revel in a job well done.
Any other tips on changing your car’s oil? Share them with us in the comments.


Facebook


<
{ 9 trackbacks }
{ 69 comments… read them below or add one }
← Previous Comments
I’m 56, and a junior high-school classmate taught me how to change oil on my first car, a ‘60 Ford Starliner. I spent so much money keeping that V-8 fueled I neglected the oil, and when I sold it back to a mechanic he said I had sludged up the engine. Then I worked in a Chevron gas station for about 6 months and got more practice. After that I’ve changed my own oil on 8 vehicles since then, even in LA and SF where I did it parked on the street. Growing up in Arizona we thought nothing of dumping the used oil on the ground to kill weeds, and after the environmental movement took hold we stopped that. By the way, are there any other Art of Manliness fans besides me who happen to be gay, enjoy working hard and getting dirty, and thereby defying the stereotype?
Back in highschool my dad taught me how to change it, we’d put it up on ramps and do it along the same lines of above. He’s older now, bad back, so he just takes it to the store. I live in a college apartment so there’s not much I can do about it right now, but when I’m out with a house I’ll be getting back to the personal changing. Even though it’s not a difficult car issue it’s a good starting point to getting oriented with cars.
Oil changes are the gateway drug of car maintenance. Grab a shop manual for your specific car. They generally include diagnostic info, drawings of how things come apart and step by step instructions for any procedure that can be done at home (which is to say almost all).
Suggestion to continue series: Brake pad replacement. Saves a lot of money, is more or less universal and takes about 15 minutes per wheel.
Does anybody actually get away with that “here, take these nice jugs of old oil” move? I stopped changing my own oil years ago when municipal trash systems stopped simply collecting it at the curb and I found NOBODY would take it from me. Shouldn’t any place that SELLS oil have to ACCEPT it back? I mean really, we expect that for SODA bottles, after all!
Here’s a few thoughts on your post.
“The 3,000 mile rule is actually good advice… if you own a quick lube and want to make loads of money. Modern engines and motor oils can actually last much longer than 3,000 miles in between oil changes.”
You go on to mention that the reader should consult his vehicle owner’s manual, which is good advice. Most vehicle owner manuals specify two different maintenance schedules depending on how the car or truck is actually driven; they’re called “standard service” and “severe duty”, or words to that effect. In my case, a 2004 Jeep Grand Cherokee, the “severe duty” maintenance schedule specifies a 3,000 mile oil change interval. Here’s a snippet from that manual:
“Schedule “B”
Follow this schedule if you usually operate your vehicle
under one or more of the following conditions.
• Day or night temperatures are below 32°F (0°C)
• Stop and go driving
• Excessive engine idling
• Driving in dusty conditions
• Short trips of less than 10 miles (16.2 km)
• More than 50% of your driving is at sustained high speeds during hot weather, above 90°F (32°C)
• Trailer towing
• Taxi, police, or delivery service (commercial service)
• Off-road or desert driving
• If equipped for and operated with E-85 (ethanol) fuel.
NOTE: If ANY of these apply to you, change your engine oil every 3,000 miles (5 000 km) or 3 months, whichever comes first, and follow the maintenance recommendations in Maintenance Schedule B.””
Note that this recommendation from Chrysler is about a vehicle with a heavy duty 8 cylinder engine equipped with a towing package. Your average passenger car has much lower tolerance for abuse designed into its mechanical bits.
As far as Chrysler is concerned, if you’re an urban driver, your vehicle probably meets the criteria for the more severe service maintenance regimen.
***
You suggest a car ramp set. Car ramps can be incredibly useful; I’ve got a set myself. I always use them in conjunction with a set of jack stands, however. I’ve always been told that ramps alone are not a safe enough support to trust your life to, and a little precaution goes a long way. You can get jack stands adequate for most light vehicles for $25 or so. And the safest approach is to always change the oil with the car resting with its wheels on the ground if you can fit under it to do the work.
***
“If it’s too tight, bust out an oil filter wrench. It’s an attachment that you put on the end of a socket wrench.”
There are actually many styles, and it’s understandable that brevity would dictate you only describe one. However, the cap-style wrench you describe only works well if there is room to swing the ratchet around under the car. Some people use strap-style wrenches, others use a giant pair of ChannelLock(R) pliers, it really depends on what works on the vehicle in question. The only way to know is to look underneath the car before you buy the tool.
Some day, you might encounter the oil filter that was apparently cranked onto the engine by an angry 900 pound gorilla. The cap-style wrenches will slip. A strap wrench won’t. One time I was caught without a strap wrench that would fit, and I solved it by drilling two holes into the cap wrench I had, then screwing through it with two sheet metal screws into the oil filter itself. Presto! No more slipping. It was a bit messy, but that’s part of the deal sometimes.
***
“If the nut is too tight, try this little trick: get a piece of pipe that’s a bit longer than your socket wrench and place it over your socket wrench’s handle. This will give you some added leverage.”
It will also break the ratchet mechanism in your wrench if the drain plug really is tight. Don’t do this. Instead, get an open end or box-style wrench, and a light ball-peen hammer. Put the wrench on the bolt, and tap the other end of it firmly with the hammer in the direction it needs to turn. This is exactly the same principle behind what makes air-powered impact guns so useful for busting stubborn lug nuts loose: you create a torque “moment” that will free the stuck plug without the risk of twisting the head off or destroying the wrench flats.
You can whack the side of your ratchet with your palm if you don’t have a box wrench, but don’t use a hammer on it. Get the right tool, even if it means putting the oil change off for several days.
Oh, and when you put the drain plug back on, finger-tighten it until it stops. Then get out your wrench and “snug” it down 1/4 -1/2 a turn. All you’re trying to do is make sure it won’t come loose, and it’s tight enough to seal. Massive muscle power is not called for here. If it’s too tight for your kid sister to bust loose with the wrench without help, it’s too tight.
***
“Some old rags. In case you drop the oil plug into the oil pan and you need to wipe it off. They’re also good for wiping off your hands.”
Two things here. First, you should be wearing rubber gloves when dealing with motor oil. It contains known carcinogens, and a thick, heavy pair of gloves will prevent you from burning your skin on hot motor oil, which can easily reach scalding temperatures.
Second, everyone drops the oil plug into the drain pan sooner or later. Those of us with our thinking caps on just reach into our toolbox for our handy magnetic pick-up tool. There are several styles, but the least expensive and most common is a strong magnet on the end of a telescoping rod. You’ll thank me after you fish your first drain plug out without burning your hands or getting them covered with oil.
In fact, if you have your engine oil good and hot, I would almost recommend just *planning* to drop the drain plug into the pan if you’ve got a magnetic pick-up tool. It will help keep you from getting burned.
Oh, and by the way, let that thing drip for a solid 15 minutes. Take the time you spend waiting for it to drain thoroughly and use it to tend to other maintenance items on the car that should be performed at every oil change:
* Check coolant level in overflow reservoir and add as needed
* Check power steering and brake fluids, adding as needed. (Clean the area around the brake master cylinder’s fill cap thoroughly before opening with a rag.)
* Check condition of belts and hoses
* Top off windshield washer fluid, remembering the tank for the rear wiper if it is separate and your vehicle is so equipped
* Check tire pressure on all four tires *and* the spare and adjust as needed
* Lubricate all door hinges and striker plates with either clean engine oil or aerosol white lithium grease
After you’re done with the oil change, check the transmission fluid on an automatic-equipped car with the engine running, parking brake set, and the vehicle on level ground. Neglecting your transmission is a sure ticket to an expensive repair job. By the way, if you have a Mercedes or Chrysler product without a transmission dip stick, pay close attention to any red fluid leaks that appear under the car, and have it serviced immediately if they appear. These vehicles are supposed to have “lifetime” transmission fluid (if not under severe service!) and thus don’t have a dipstick.
Good luck as you progress in at-home car repair, it is a rewarding, and most manly skill to acquire.
–Geoff
For those looking for a place to dispose of your motor oil, call your nearest Wal-Mart. The chances are high that: 1) They accept used motor-oil; 2) It’s free; and 3) You don’t need to drop it off in a specific container, just dump it in their receptacle. They will likely require you to sign a log, so you don’t come in that often (they don’t want mechanics using them as their disposal).
I would recommend finding the oil filter under your car before deciding to change the oil on your car for the first time. As allegedly rewarding as changing your oil is, if your oil filter is in a truly unfortunate location (thank you, GM), you might be better off not doing it yourself. On my old car, the only way I could get at my oil filter was by removing the wheel and unscrewing the sheathing around the wheel well. I found that really annoying and NOT rewarding. That’s the type of oil change you should just pay someone to do for you–especially in an unheated Minnesota garage in winter–unless you really love sliding under your car.
Of course, like Brett said, if you’re really gung-ho, you WILL be able to get the oil filter off . . . eventually. But there’s no guarantee you’re going to want to do what it takes, especially if you don’t have your car on a ramp/lift/jacks and you have to unscrew the filter by hand or with a strap wrench.
That’s just my take. On my current car, the filter isn’t a problem, so I will probably start changing my own oil once I have a garage, but if I still owned my own car, it just wouldn’t be worth it to me.
Another thing I wanted to mention: most recycling centers that I have ever seen have a large motor oil receptacle.
Like you and Geoff said, use a ramp and/or a set of jack stands. It really can’t be emphasized enough that a jack alone isn’t enough to support a vehicle safely. They’re unstable and if the car falls, it will probably kill you.
While not mentioned, I recommend filling the filter at least half-way with oil. Also, after checking for leaks and finding none, back the car off the ramps, shut down and be sure to check the level on the dipstick.
As to disposal, most communities have a hazardous waste program and in addition to Walmart, most auto parts stores will also take that old oil off your hands.
What about the cost associated with oil disposal? You can’t (or at least shouldn’t) just throw the oil away. It should be disposed of properly and environmentally, and that costs money. Plus, your 20 minutes (or less) of sitting in your car is less time than going to the store, buying the oil and filter, and changing the oil. Also, you need the initial outlay of the jack and drain pan, not huge costs, but costs nonetheless.
My dad is a mechanic, has the necessary tools, and hardly every changes his own oil because the cost and time are more for him to do it than to spend $25.00 and have it done for him.
Tamara, those are certainly additional factors to consider when making the decision. For instance, the is a cost to dispose of the used oil. However, as has already been pointed out, there are numerous businesses in most communities that accept used motor oil for free, so no additional cost is borne.
The time you quote at the quick-lube (20 minutes) does not include travel time to the quick lube. So, travel time to quick-lube vs. travel time to store to buy supplies is probably a better fit and equal. Plus, you can stock up on oil and filters if you find a good deal, or you can multitask and pick up the supplies when you are headed to a store like Wal-Mart for something else. Additionally, if you get good at the change, you can likely complete the task in less than the 20 minutes if-you’re-lucky time frame you wait at the quick lube.
True, the initial outlay for jack stands and drain pan (why not use what you’ve got, though) is greater than a quick-lube, but you’ll probably make that up after 2 DIY changes.
Is your dad a mechanic by trade or by hobby? If by trade, I can understand why he wouldn’t want to do the mundane car maintenance things himself. However, most hobbyists I know gladly perform any and all maintenance and repair themselves. After all, it’s what they enjoy.
Awesome post. I love working on my car, and would encourage all men to do the same. However, when buying oil for your car, pay attention to the weight you are buying. Most engines take a 10W30 or 5W30 motor oil. Using them interchangeably or even mixing them together won’t really hurt, but most manufacturers recommend a certain weight for certain temperatures. However, many newer engines (such as Hondas, and maybe some Fords, not sure) require a 5W20 oil. Sometimes it is stampted on the filler cap. When in doubt, look in your car’s owner’s manual. They all have a page called “fluids and capacities” or something like that. It lists how much oil you need to fill your car or truck, and what weight to use. Buy that every time, and you’re good to go. As far as brand, I like Pennzoil, but as long as it has the SAE logo on the bottle (little blue emblem with white SAE letters), you’re good to go. Happy wrenching!
D’oh. Speed reading….Brett did of course mention that the proper grade is required…I just didn’t see any specifics.
I know this will probably get flammed, but I really dont mind dropping my car off at Walmart for an oil change. I have the tire plan, so they alse rotate my tires, air them up, top off all my fluids, and even vacuum out the front seats of my car. It costs about $25, but I can drop it off on my way to work (right next door to where I work), pick it up on my way home, and be done for another 3 months. To me, saving the extra $5 just isnt worth it here – I will save the money on my groceries or other things.
Note that you also get to make sure it gets done RIGHT. You get to choose your oil, and you gain familiarity with your car. The black box has one layer of opacity stripped away.
Great idea. Despite some of the folks wanting to debate you on the cost effectiveness of changing your own oil, there is something very rewarding from working on your own car. I did not change my oil since it was due, but I changed my air filter, wiper blades and will be changing out my spark plugs.
Despite taking auto-mechanics in high school, I have gotten away from doing any maintenance on my vehicles. I used the same excuse as others- my time is too valuable. However, I will conduct basic maintenance on my cars because it is rewarding and I do want to know about my vehicles in case of an emergency.
Thanks for the article.
My father taught me how to change oil before I could even drive. My first car was a 1972 Gran Torino Sport. I to this day remember my fist major scewup. I had drained the oil, removed the filter, installed the new filter, and then removed myself from under the car. I proceeded to dump 7 quarts of the new(then) Castrol Syntec in the engine. Little did I know that it had all run out of the drain hole that I forgot to plug. What a mess. That was the last time I made that mistake.
If your oil filter is stuck and your normal tools won’t get it undone, once it’s drained, punch a hole in the old filter with a screwdriver. That should give you the adequate torque to remove it. It isn’t pretty, but it works.
← Previous Comments