Editor’s note: This is a guest post from Jeff Rose. Mr. Rose is an Illinois Certified Financial Planner and co-founder of Alliance Investment Planning Group. He is also the author of Good Financial Cents, a financial planning and investment blog. You can also learn more about Jeff at his website Jeff Rose Financial.
We last heard from Mr. Rose when he was filling us in on how to be financially studly. He was also kind enough to give us a glimpse into the life of a financial planner.
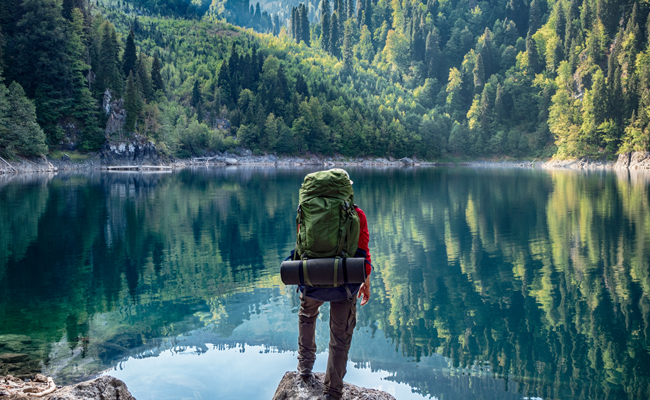
Car camping is cool, but there’s something awesomely manly about putting everything you need to survive on your back and heading out into the woods. This year marked my second manly trip with my buddies as we adventured out for a week into the wilderness with everything we needed to survive on our backs. Last year we conquered the Smoky Mountains. This year took us to the great national park of Yellowstone. In case you’re considering backpacking yourself, I wanted to give a few tips to help you out on your next manly expedition. Let’s run through a list of things that you might need.
1. A Backpack Like No Other
Kind of goes without saying, doesn’t it? But, you don’t want just your typical backpack. Last year, I tried using a Bug Out bag that I had purchased in Iraq while on deployment. It’s one of the coolest backpacks I have ever had, and I thought it would work fine while in the Smokies. About 30 minutes into our first trail, I realized the huge mistake I had made. My shoulders were killing me and by the end of the trip so was my back. I learned the hard way that I needed a “real” backpack to last me throughout the trip. Taking my friend’s advice, I headed up to the closest REI where I spent over an hour and a half getting fitted by one of their sales assistants. The end result? After hiking 35 plus miles in the Yellowstone National Forest, I can tell you the time and money spent was well worth it. The REI backpack is the most comfortable backpack I’ve ever had throughout high school, college, and even my military career.
2. Take Care of Your Feet
When I was in the military I started off in the infantry division, and the one thing our Drill Sergeants always told us was to take care of our feet. It’s no different on a backpacking trip. Taking care of your feet means getting the right shoes and also the right socks. My friends had decided to spend a little bit more money and get some Merrell hiking boots. I particularly wasn’t all excited about spending an extra $120 just on shoes, although I knew it was probably worth it. I decided instead to purchase some $60 Nike trail shoes. I have to confess, I was very pleased with the Nike’s. Not only did I wear them in the Smoky Mountains, but I also wore them again this year in Yellowstone. The only complaint I have is the fact that they’re not waterproof, which can be an issue when crossing streams. Other than that, I’m the only one out of seven guys that never got a single blister. I contribute some of that to my shoes, but wearing true hiking socks helped as well. I found some hiking socks at Dick’s Sporting Goods that kept my feet from getting blisters both trips. Once again, well worth the investment.
To be a good friend, be sure to pack some moleskin for the guys who do get blisters. There aren’t too many things worse than hiking up a mountain with several blisters on your feet.

3. Stay Hydrated
“Beat the heat Drill Sergeant, beat the heat!” That’s what we used to yell in basic training after we chugged out of our canteens. While hiking in the wilderness, you want to make sure to keep hydrated. Once again, my military background came into play, and I was able to bring my CamelBak that I had and use it in my pack. You also want some type of water bottle, maybe a Nalgene to keep extra water in as well. You can never have too much water.
Editor’s note: In my opinion, the best water bottle in the world is the Camelbak bottle with the bite valve. Drinking from a Nalgene bottle always left me with water on my face. The Camelbak bottle has this great sippy straw that lets you easily take big gulps of water. And it doesn’t leak, even if you hold it upside down. It’s awesome.
While hiking in the wilderness, you don’t want to drink directly out of the stream. Well, you can, but remember that what goes in must come out, and drinking out of a stream doesn’t always come out as pretty. To prevent a case of Montezuma’s revenge, you’ll want to consider packing a water filter with you.
4. Time to Sleep
When it’s time to hit the sack after you’ve been hiking for eight to ten hours a day, you’ll want to sleep comfortably. There aren’t any Comfort Suites to check into, of course, so you’ll want to pack accordingly. You’re going to want a tent and an extra warm sleeping bag. Keep in mind that you’ll want a lightweight tent and sleeping bag because you’ll have to carry them on your back. For example, my two man tent weighed approximately 3.5 pounds. I even packed a little extra pillow about the size of one that you’d get on an airplane. Both years I went without a sleeping pad, but I can tell you that next year I’m going to make the purchase. Sleeping on hard ground with rocks and everything else underneath you is not fun.
5. Feed That Belly
When you’re hiking with a 50 pound plus pack, you want to make sure you stay nourished. There are times when my blood sugar felt low, and I needed a quick fix. Be sure to take granola, power bars, nuts, jerky and other quick little snack foods that you can eat while you’re hiking. After you’ve been hiking the whole day, it’s time to treat yourself to some good grub. We opted to go with what’s called Mountain House meals, which are far superior than any MRE (Meal Ready to Eat) I ever had in the military. To prepare the Mountain House meal, all you need is 16 ounces of boiling water. Obviously, boiling water doesn’t come from a mountain stream. You’ll need to pack a lightweight stove and something to light it with. Pack a few lighters and some waterproof matches for backup.
The Mountain House meals are awesome. They cost anywhere from $5-$7 and you can get a variety of flavors. Anywhere from Beef Stroganoff (my favorite), Lasagna, and Chicken Teriyaki. All it takes is two cups of water, pour it into your bag, let it sit for eight minutes, and voila, you’ve got instant cuisine in the middle of nowhere. Another plus is that you eat them right out of the bag which makes clean up that much easier.
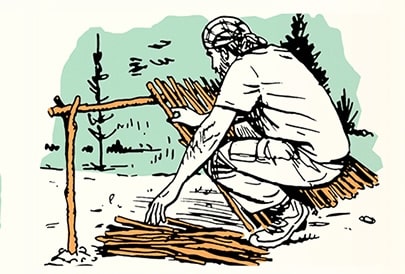
After you’ve eaten all of your dinner and snack food, don’t forget to bring some sealable trash bags – preferably zip-lock bags to put your trash away. You also want to bring a 50 ft rope/cord to hang up your pack. Yellowstone has designated bear poles where you can string up your pack about 10 feet in the air to keep wildlife out of your campsite. You want to enjoy your food, but you also want to make sure that no other bears or any other wildlife enjoy your trash.

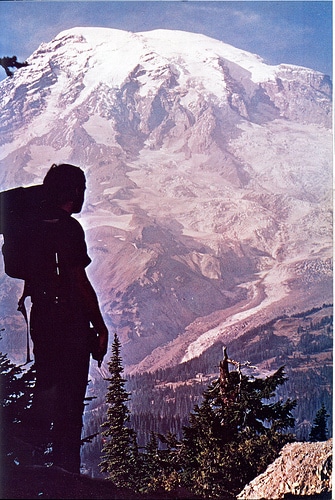
6. Don’t Dress To Impress
This year was harder to plan for clothing-wise because Yellowstone has an extreme range of temperatures. While we were there, it went from 85 degrees during the day to a low of 38 degrees at night, not including the fact that it rained every single day that we were out there. To battle the heat, I wore what I wore while in Iraq – my beloved Under Armour heat gear. At night, I brought out my beanie, and my North Face jacket to keep me warm. The jacket took up a little bit of extra room in my pack, but it was well worth it. The other good purchase that I made on this trip was a pair of convertible pants. These are the pants that you can wear as pants to keep you warm at night, but then unzip them and you’ve got shorts while you’re hiking in the 85 degree heat. They were perfect for the unpredictable Yellowstone weather.
7. Plan for the Miscellaneous
Since Yellowstone is well-known for their grizzly bears and black bears, we thought it would be a wise investment to at least have one or two cans of bear mace. It’s kind of pricey at $35 a pop, but I figure $35 is worth it in case I came across an angry momma grizzly and her cubs. I guess it’s not as “manly” as wrestling a bear, but my ego is still in check. You also want to think about bug spray (mosquitoes were horrible!), a camera with long life batteries so that you can remember the trip, and bio-degradable baby wipes-these aren’t just for the hands.

8. Smells Like Roses
The last thing is to make sure you pack deodorant. I know what you’re thinking – “You’re a man, why does a man need deodorant when he’s out in the wilderness?” You are absolutely right! You don’t need to use any deodorant while you’re out in the wilderness. In fact, I took pride in not showering the whole time we were camping out (I did shower the night before we left). Deodorant comes into play for the ride home. Having flown out there, I thought the “manly” and polite thing to do was to not smell like I had backpacked for the last week to the person flying next to me. Even manly men have to have some sort of personal hygiene etiquette, right?
If you enjoyed Jeff’s post, read more of his stuff at Good Financial Cents, and subscribe to his RSS feed.